.png)
It is the project administrator who has the rights to set up status. How to do this is explained below, so that a user who requires a new status will know the choices that have to be made.
-
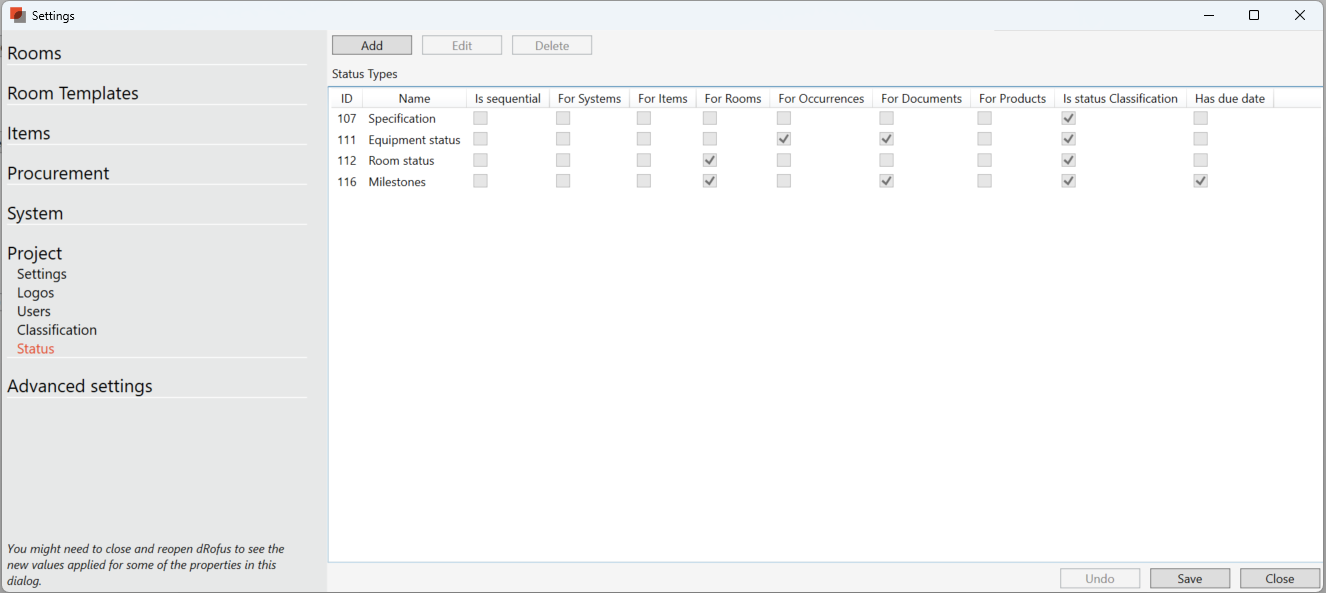
The setup can be found in the home page under Settings → Project and database administration → Settings
-
Under project, choose "Status"
-
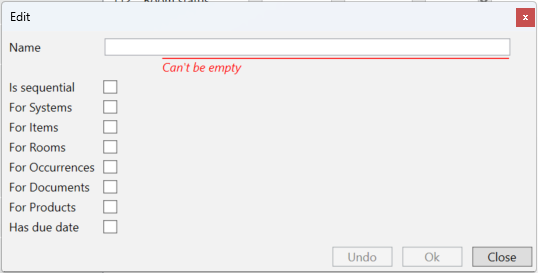
Press "Add" to get the dialogue below:Name - will end up as the name of the work process (eg. "Product workflow")Is sequential - choosing this, means that a user only can choose the statuses that are further out in the process than the current status. Only the admin can go back in a process.For systems - For items - For occurrences - For Rooms (New feature) - For products - concerns what this work process should be set up for. Please note that if you choose e.g. both items and occurrences here, there will be separate statuses on items and occurrences, as described above.Has due date - enables a date field on the status.
In the example above, the setting looks as follows:
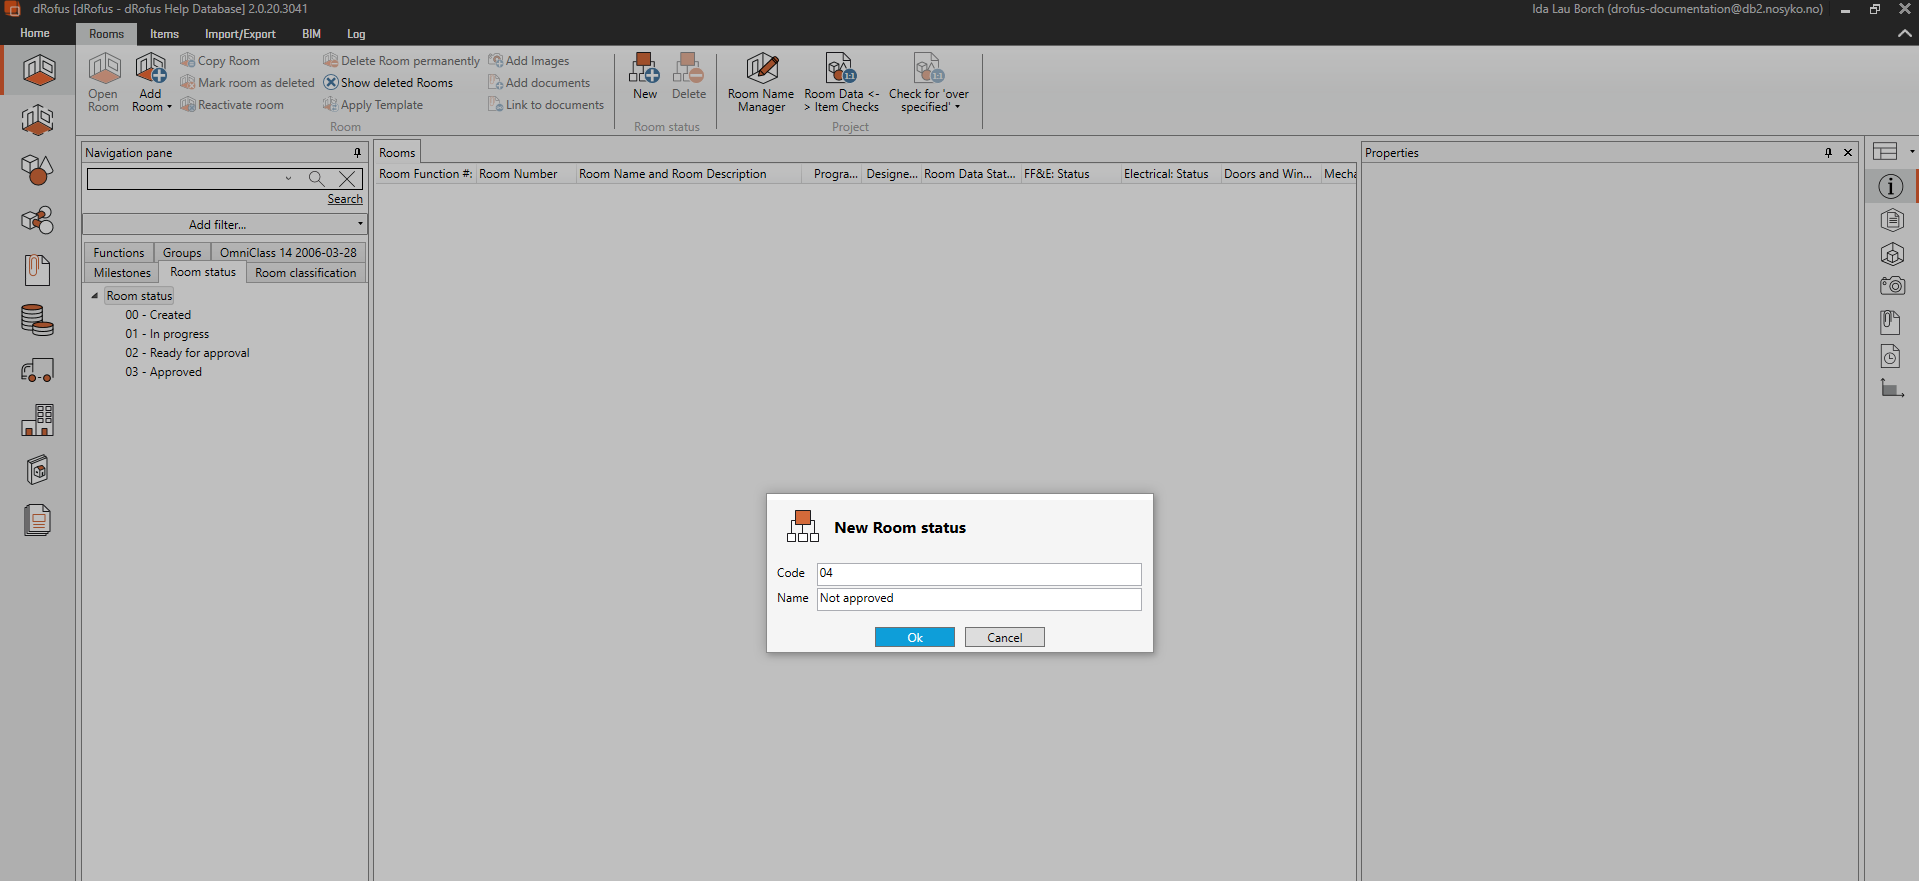
Then admin then needs to go into the items navigation panel to set the steps of each work process. For example, to add a new step - Not approved - to the Room status process, the user has chosen "New" at the top right, to add the properties of the status "Not approved":
Once a status has been added, it can immediately be used by all who have access to the database.