.png)
The illustration below shows a possible example of a Finishes List for a room.
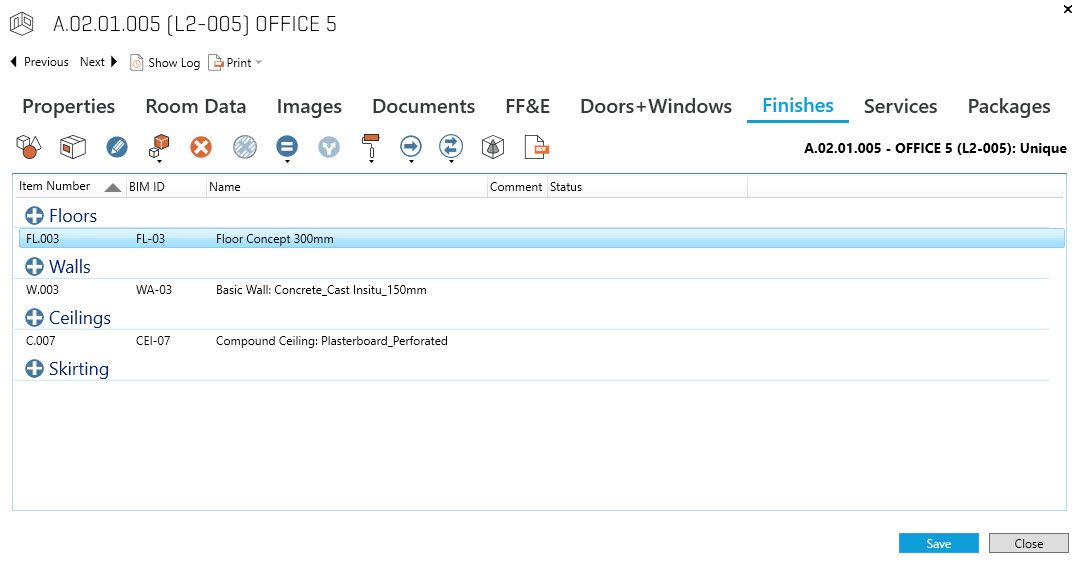
The toolbar has the following options:
-
Previous/Next buttons displays the finishes Lists for the next and previous Rooms at the same functional level you have selected.
-
Show log button displays Finishes List changes made to the room.
-
Print - Generate a finishes report for this room.
Icon Buttons (from Left to Right) -
Open Item: Open the Specification of selected finish
-
Open Product: Open the Product information for the Item
-
Edit: Edit the Quantity, Existing Quantity and Comment and Occurrence Data and Statuses for the Finish occurrence
-
Existing Items: allows you to create a record for an Existing Item or to associate a pre-defined Existing Item to the Finish Item
-
Delete: removes the selected Finish from the list for that Room
-
Undo Delete: undoes the selection for deletion for the Finish Item. Please remember to do this before saving. If you save first, the delete function will be performed and you will not be able to undo.
-
Copy button allows you to copy Finishes List from or to another Room. Note that this option will also copy the Finishes Status from / to the Room being copied to e.g. if you have opened a room with unique Finishes List and copy Finishes from a Room connected to a Room Template – the status of the Room will change from Unique to having Finishes from the same Room Template.
-
Split occurrence: If there is a multiple quantity for the Finish Item, this will split the Finish Item to multiple single occurrences.
-
Item Status List: to change the Status of the Item List (options are: Unique / Derived / From)
-
Move Occurrence: move occurrence of Finish Item to another selected Room
-
Swap Item: Swap selected Finish Item for another Finish Item selected from the Finishes List
-
Show Sub Items: displays the list of sub Item for the Item selected.
-
Show in Revit: will zoom to the selected Finish Item in the active, linked Revit Model.
-
Save Save changes you have applied to the list
Add Finishes Items
To add Finishes Items to a Room or Room Template, select the "+" button next to the Category to which you would like to add the Items. This will open the Items overview where you can select the Finishes Item to apply to the room. If the dRofus superuser has added an Item Group filter for the Category (as explained in chapter 14.2) the list will be automatically filtered to the correct Items Group;
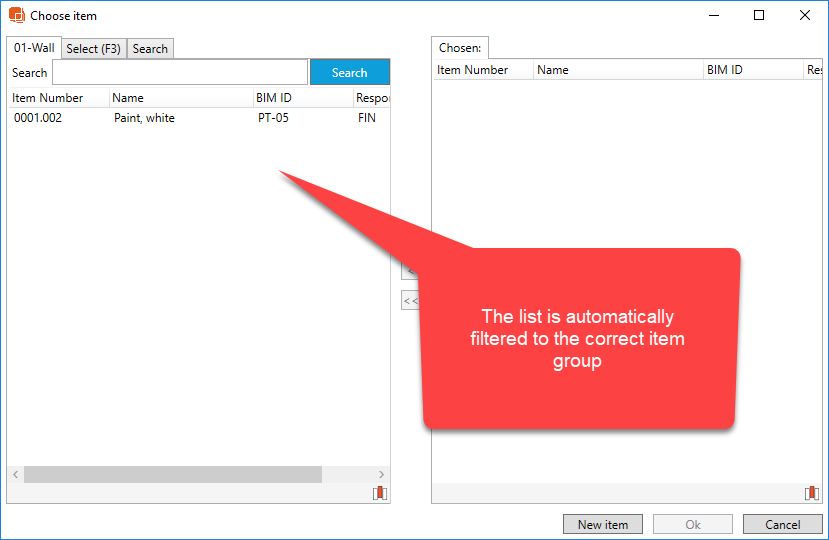
The filter will ease the process of finding the correct finishes to add. If you would like a full overview of all available items in the overview – use the Select (F3) tab or search for items using the Search tab.
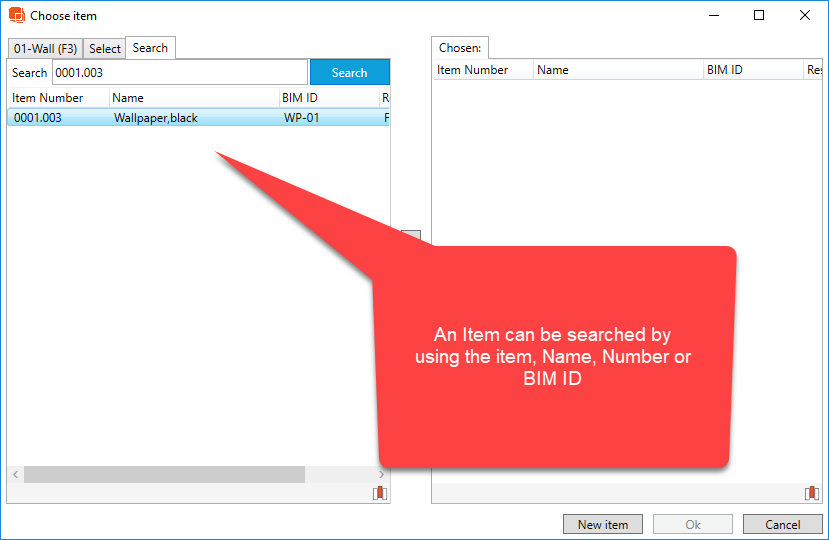
You add finishes by moving them from the left list to the right. Either by double-clicking on the items on the left of using the arrow icons in the middle of the window. Click 'Ok' when done editing.
Create view filters to control which parameters are visible for finishes
The project can use Items type filters to control what parameters that are available when you open a Finishes Item. To learn how the Project Administrator can set up view filters to different kind of items see Items Type Filter.
Revit Materials connection
For more information on how you can link and synchronize Finishes with Revit Materials please view Revit Room Finishes and Materials with Finishes Items.
Finishes video
See this video for a tutorial on how to use finishes in dRofus and Revit.