.png)
Link and Synchronize Materials with Finishes Items
Linking Materials to Finishes Items works in the same way as linking Family Types to Items. Read more Link and Synchronize dRofus Items and Revit Family types
You can apply filters on both Revit Category as well as Responsibility Groups to make your linking process easier.
Materials have their own configuration under Revit Instances - Item <--> Revit Materials.
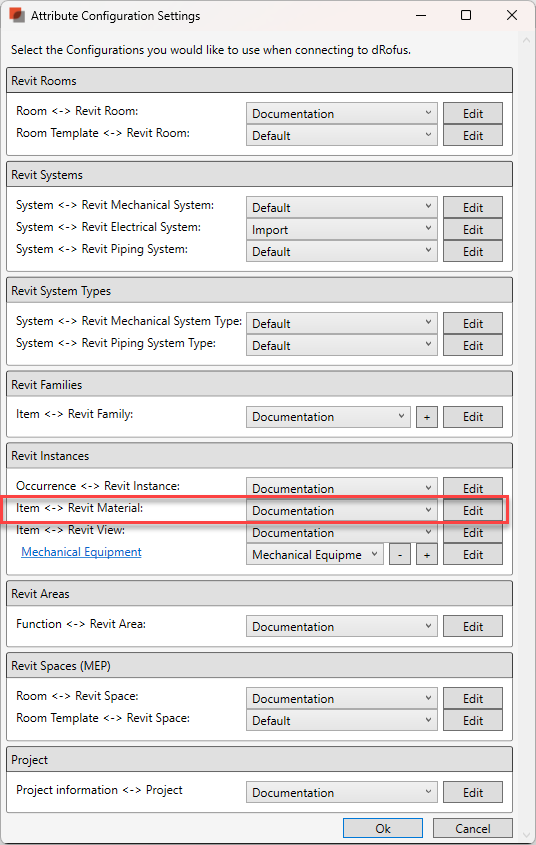
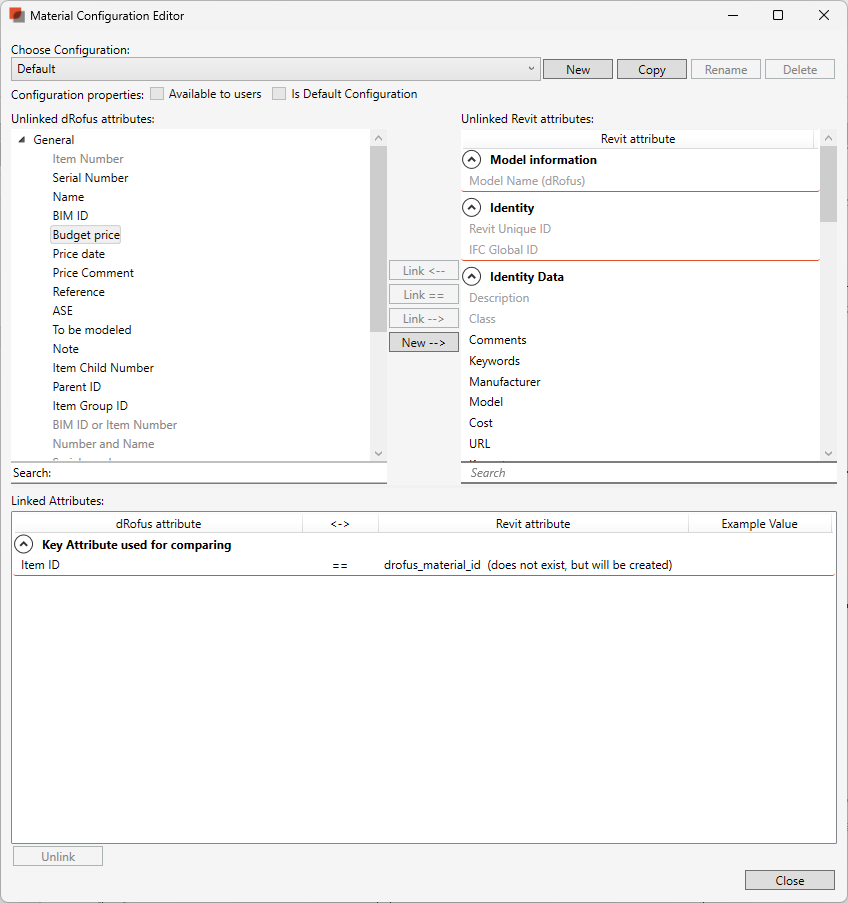
The default key to map to an item will be created as a custom parameter called drofus_material_id
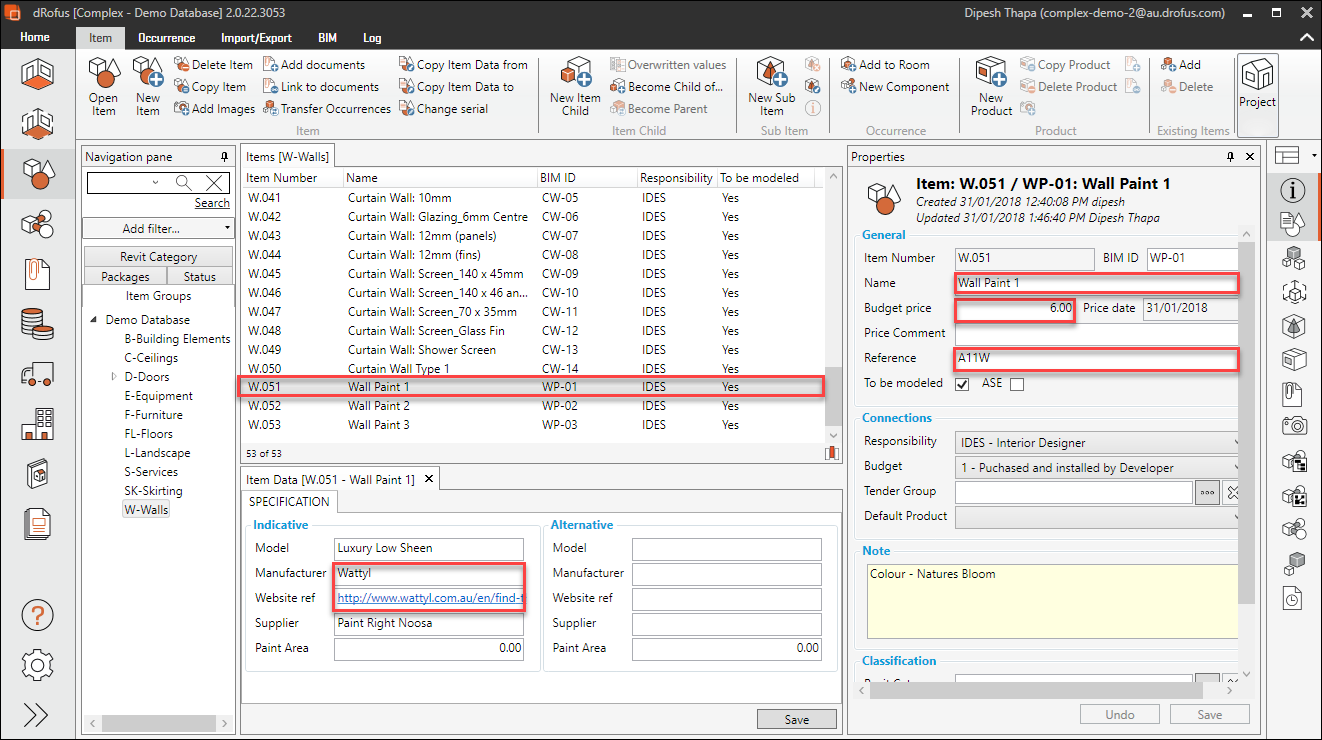
If you haven't already done so, you can now start to input some data within dRofus for your Finishes Item(s), say "Wall Paint 1".
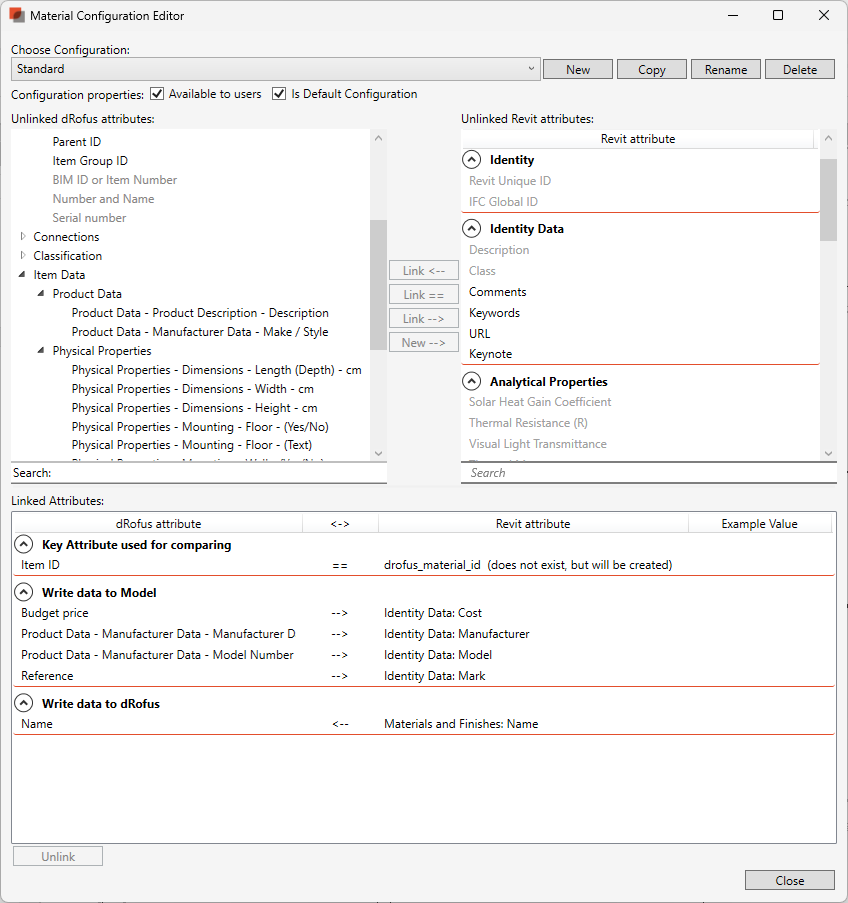
Update your configuration to include values intended to populate the Revit Material
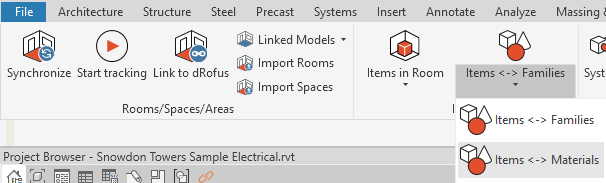
You can then link your Finishes Item in dRofus to a Material in Revit by selecting "Items <-> Materials":
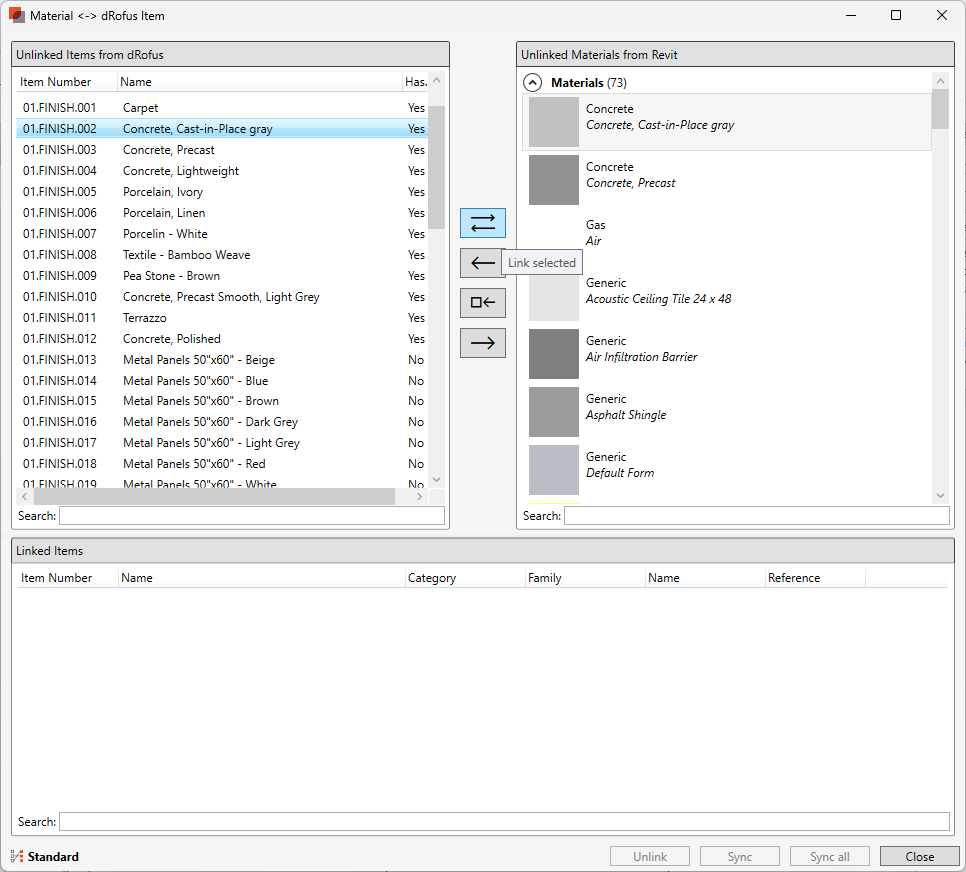
A new dialog window will pop up where you can then browse or search for the new Finishes Item in dRofus as well as the corresponding Material in Revit, then link
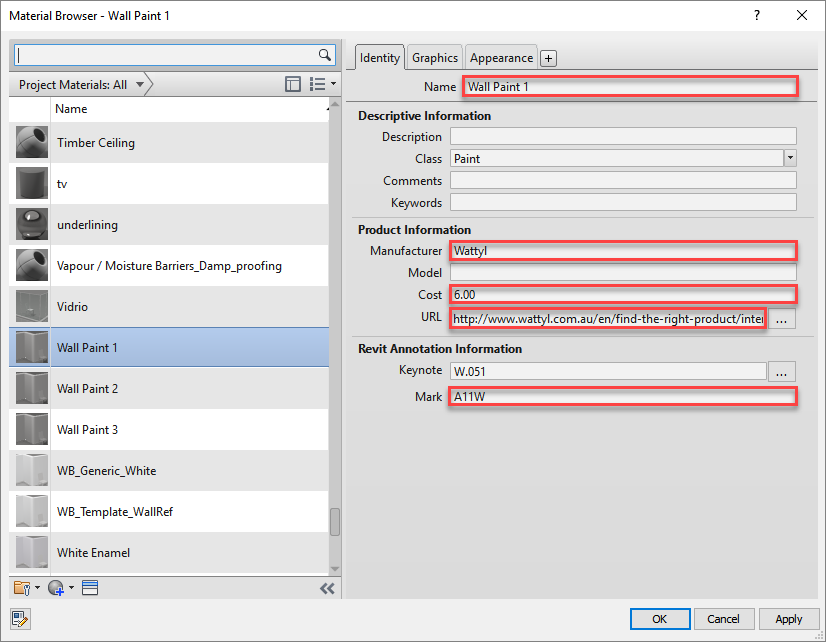
Once the link has been made, you can synchronize using "Sync All", after which you will be able to see the new values within the "Identity" tab for your Material in the Material Browser as follows:
If you then apply the material "Wall Paint 1" (using the Paint tool) to your Room's walls in Revit:
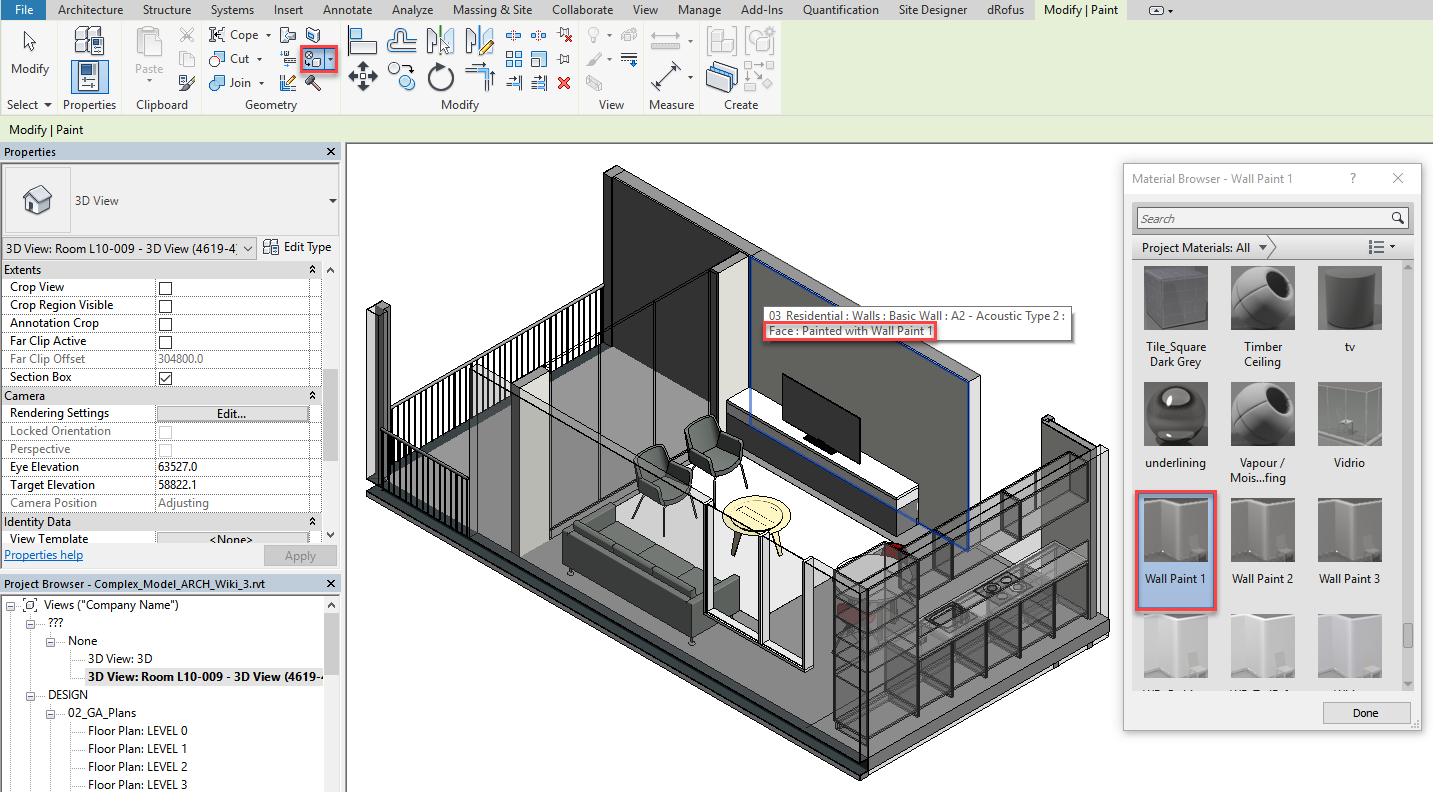
If you then insert a Material Tag (that includes "Mark"), you will be able to identify the type of paint within your model as follows:
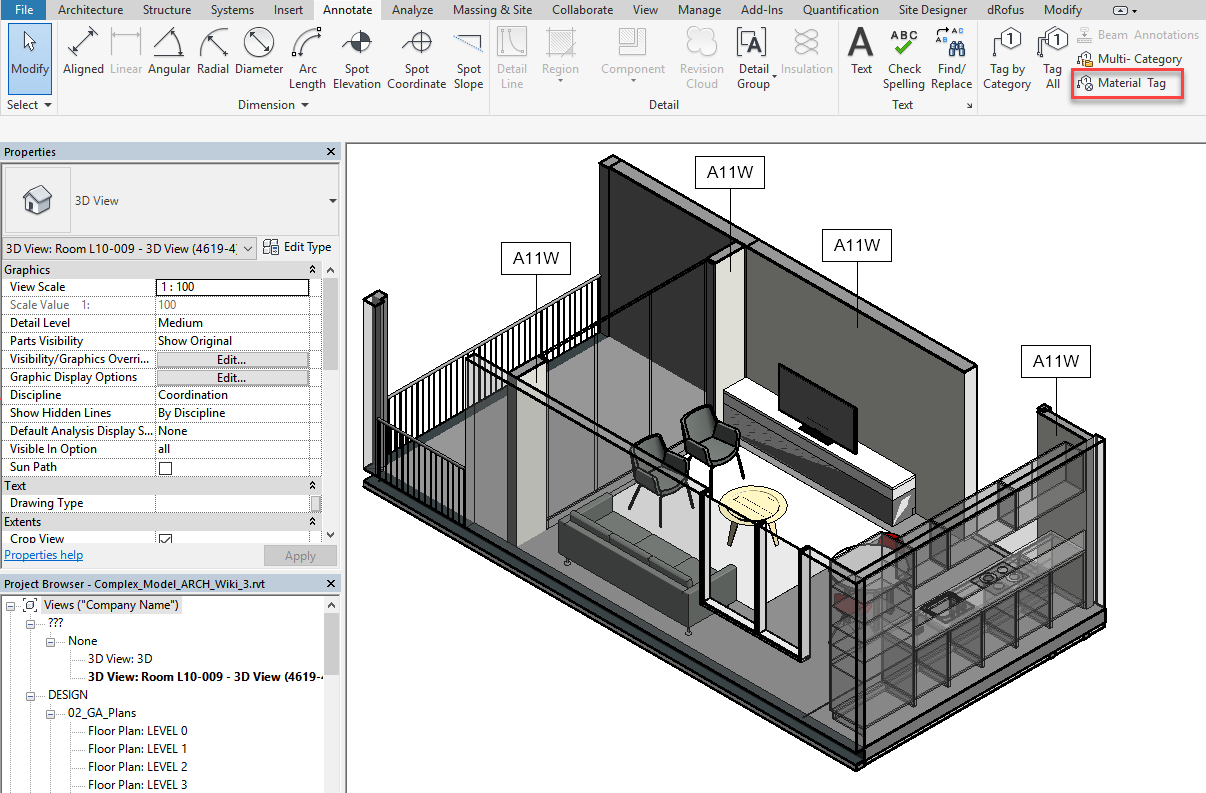
In this example, the value "AW11" was pushed from "Reference" in dRofus to "Mark" in Revit.
After applying the paint within the Revit model, you can then synchronize once again so that dRofus will then be updated with the calculated (designed) "Paint Area" from Revit (as a sum) as follows:
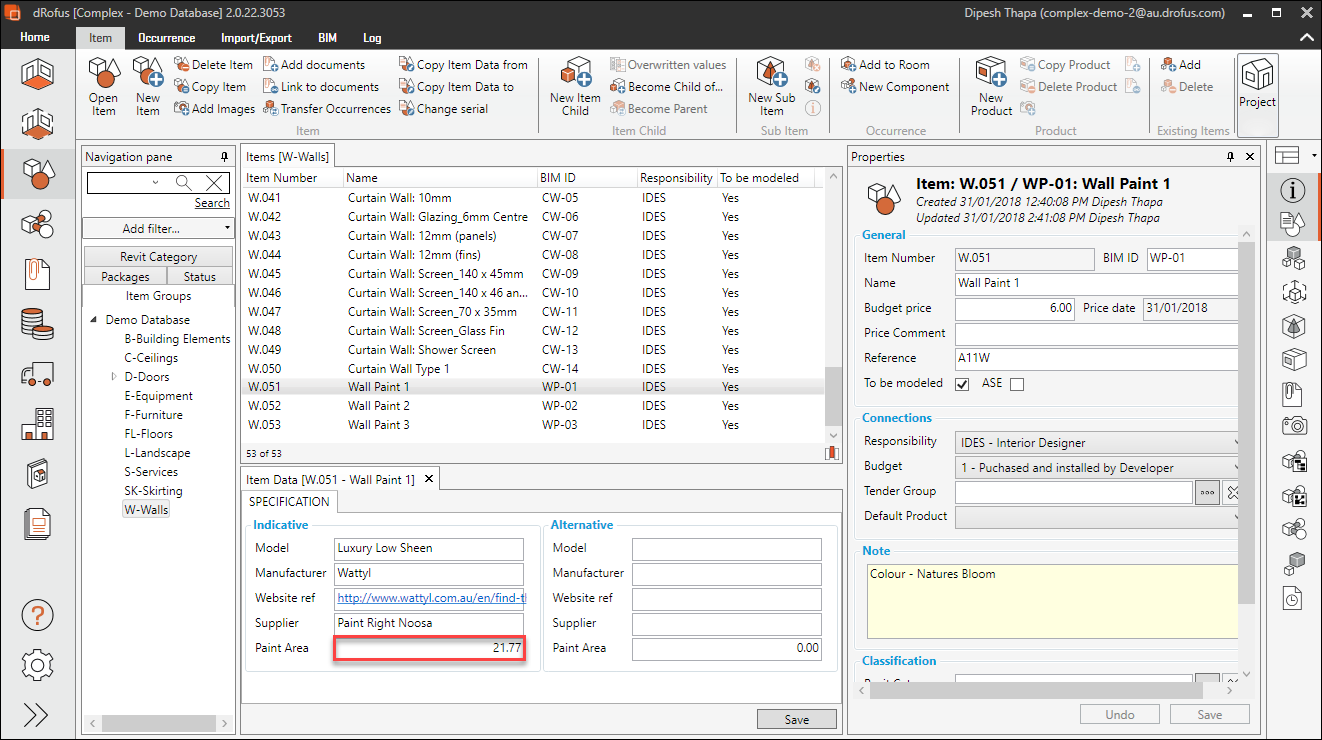
This information that is now in dRofus can then be used for creating schedules (within dRofus) which provide the calculated areas and / or volumes of the Finishes Items.