Occurrence Images

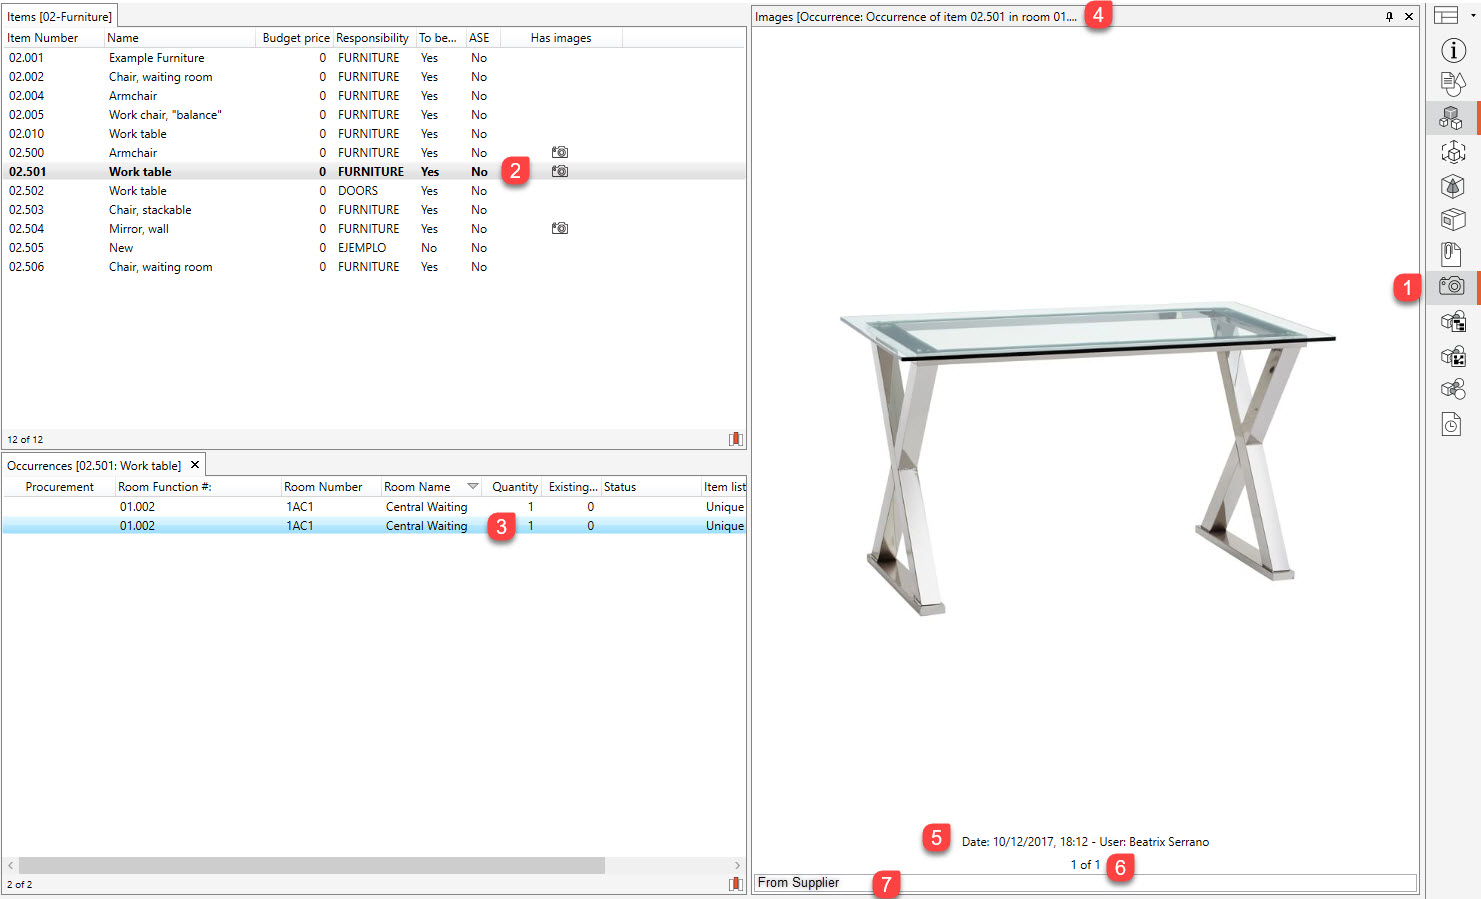
1: Shows/ hides image window. Note that if this icon is not selected, the Images ribbon will not be displayed.
2: To view the occurrence associated to the item, the item will first have to be selected.
3: With the item selected, select the occurrence that you wish to view that item for.
4: Number and Name of the selected occurrence of item.
5: Date/Time image was uploaded and user who uploaded the Image.
6: Image position of current image in view.
7: Single line edit that can be auto filled if image is imported from Revit or can be edited manually.
The Images Ribbon

Add Images: Adds an Image to the selected item.
Delete: Deletes the selected image.
Save: Downloads the current Image.
Up: All Items have a list of Images. This Command move the image one level up in that list.
Down: All Items have a list of Images. This Command move the image one level down in that list.
Rotate: Rotates the current Image 90 degrees clockwise.
Copy: Copies the current image so it can be pasted somewhere else.
Show image in full size: Shows the Image in full size.
Inheriting Images
In addition to occurrence images, item and product images associated with the occurrence will also be shown here. Note the title in the image pane clarifies where the images are coming from.
When adding Images to Items and Templates, there are certain restrictions on when they will automatically inherit to occurrences and template derivations. The table below explains when images will be inherited or can be added:
Images for Items and Derived Templates
Item Occurrences | Child Items | Derived Templates | |
|---|---|---|---|
Images automatically inherited | ✖️ Images are not inherited as multiple occurrences can exist and are likely to be unique. For example, at the occurrence level you may want to show a picture of a chair with each occurrence having a different color. | ✔️ Images are inherited because a child item becomes a unique item. Child items maintain a connection to the parent item. | ✔️ Images are inherited as a derived template maintains a connection to the original template |
Images automatically inherited can be deleted | N/A | ✖️ | ✖️ |
New Images can be added | ✔️ | ✔️ | ✔️ |
.png)