.png)
Steps to Adding Users to a Project
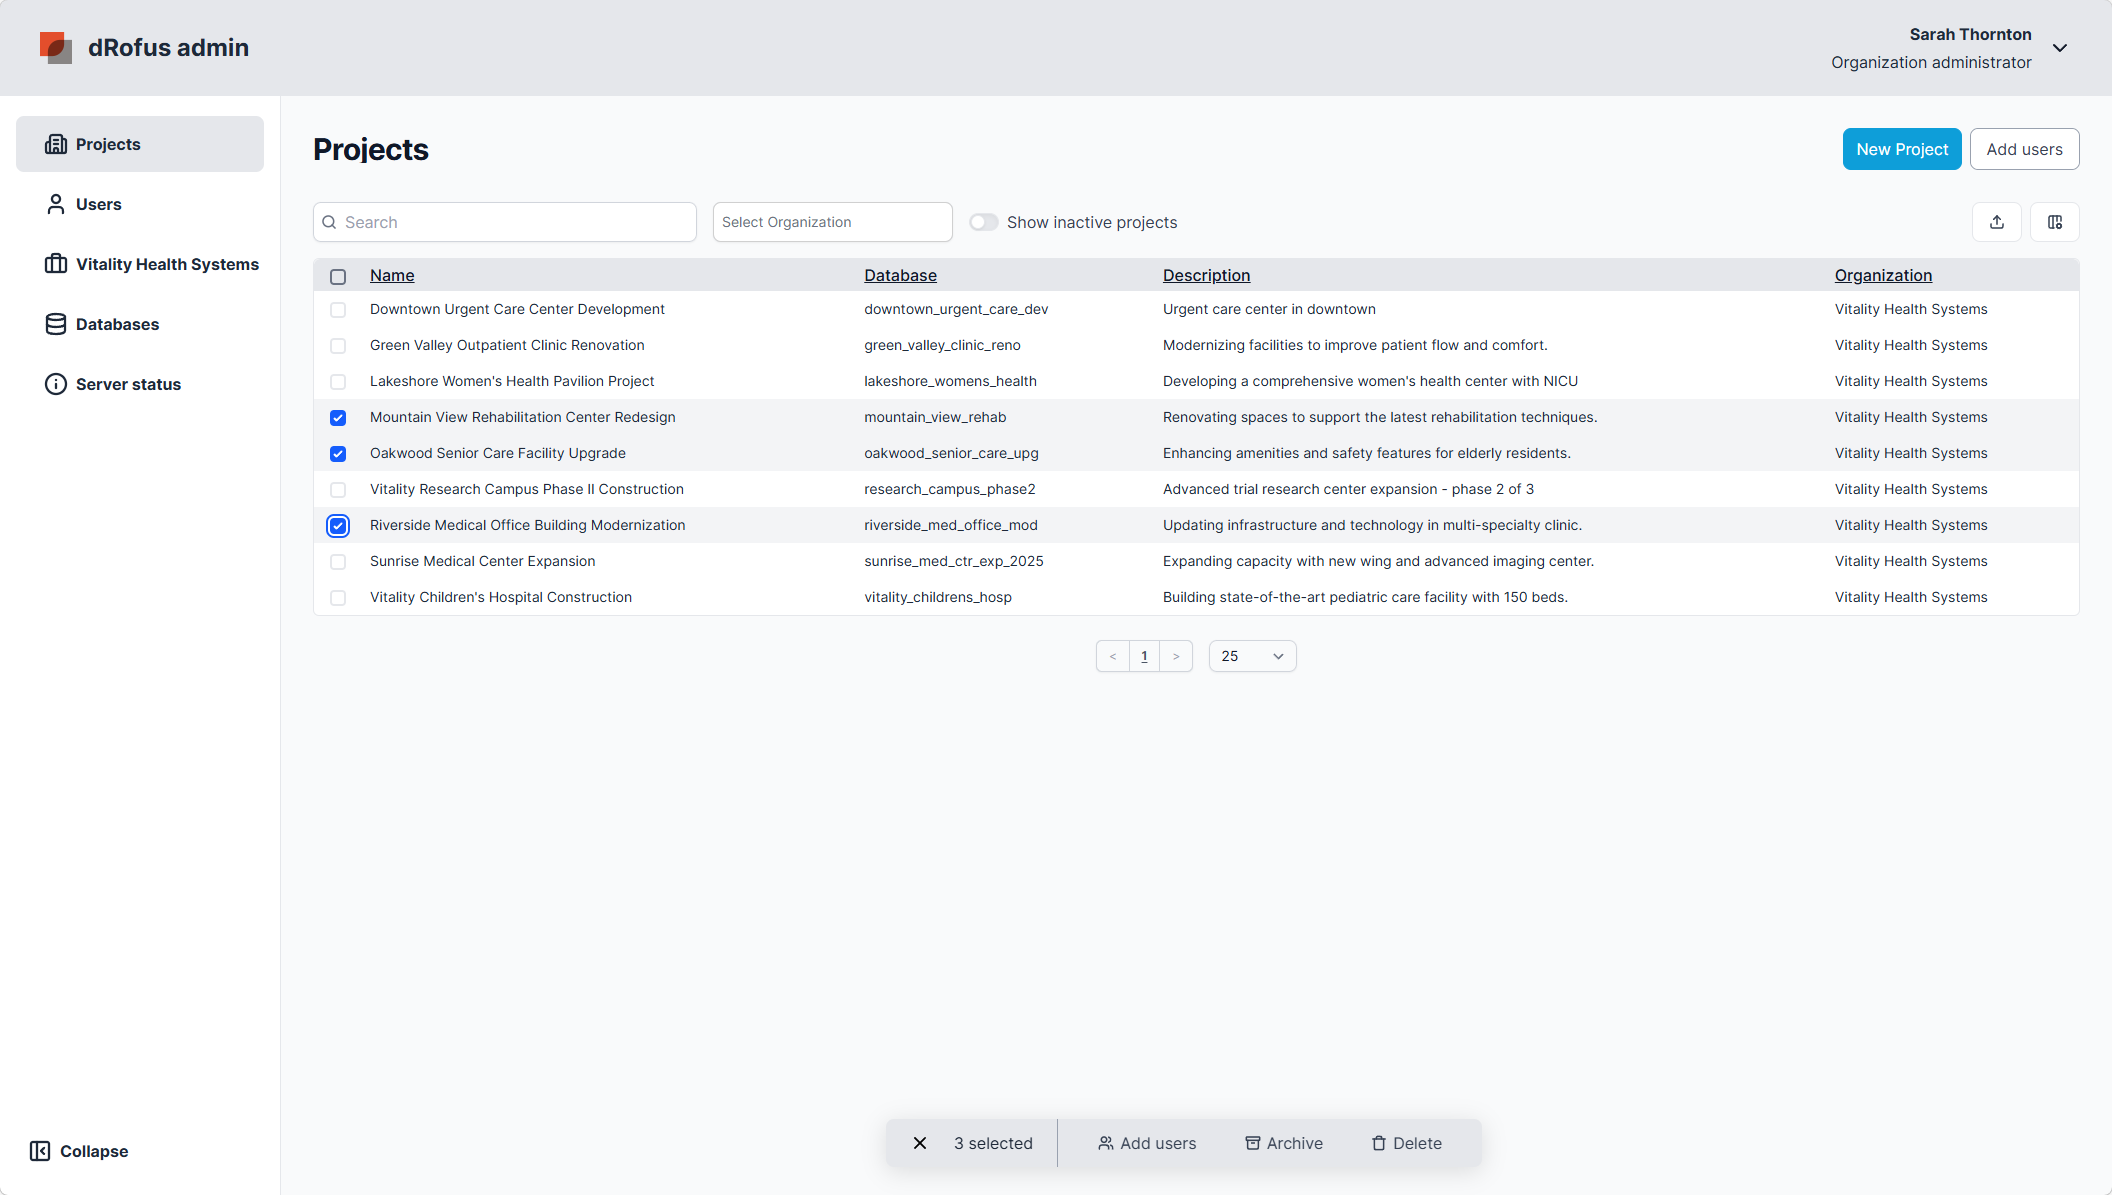
Select Projects
Start by selecting one or many projects to add users to, then use the quick bottom menu and select Add users.
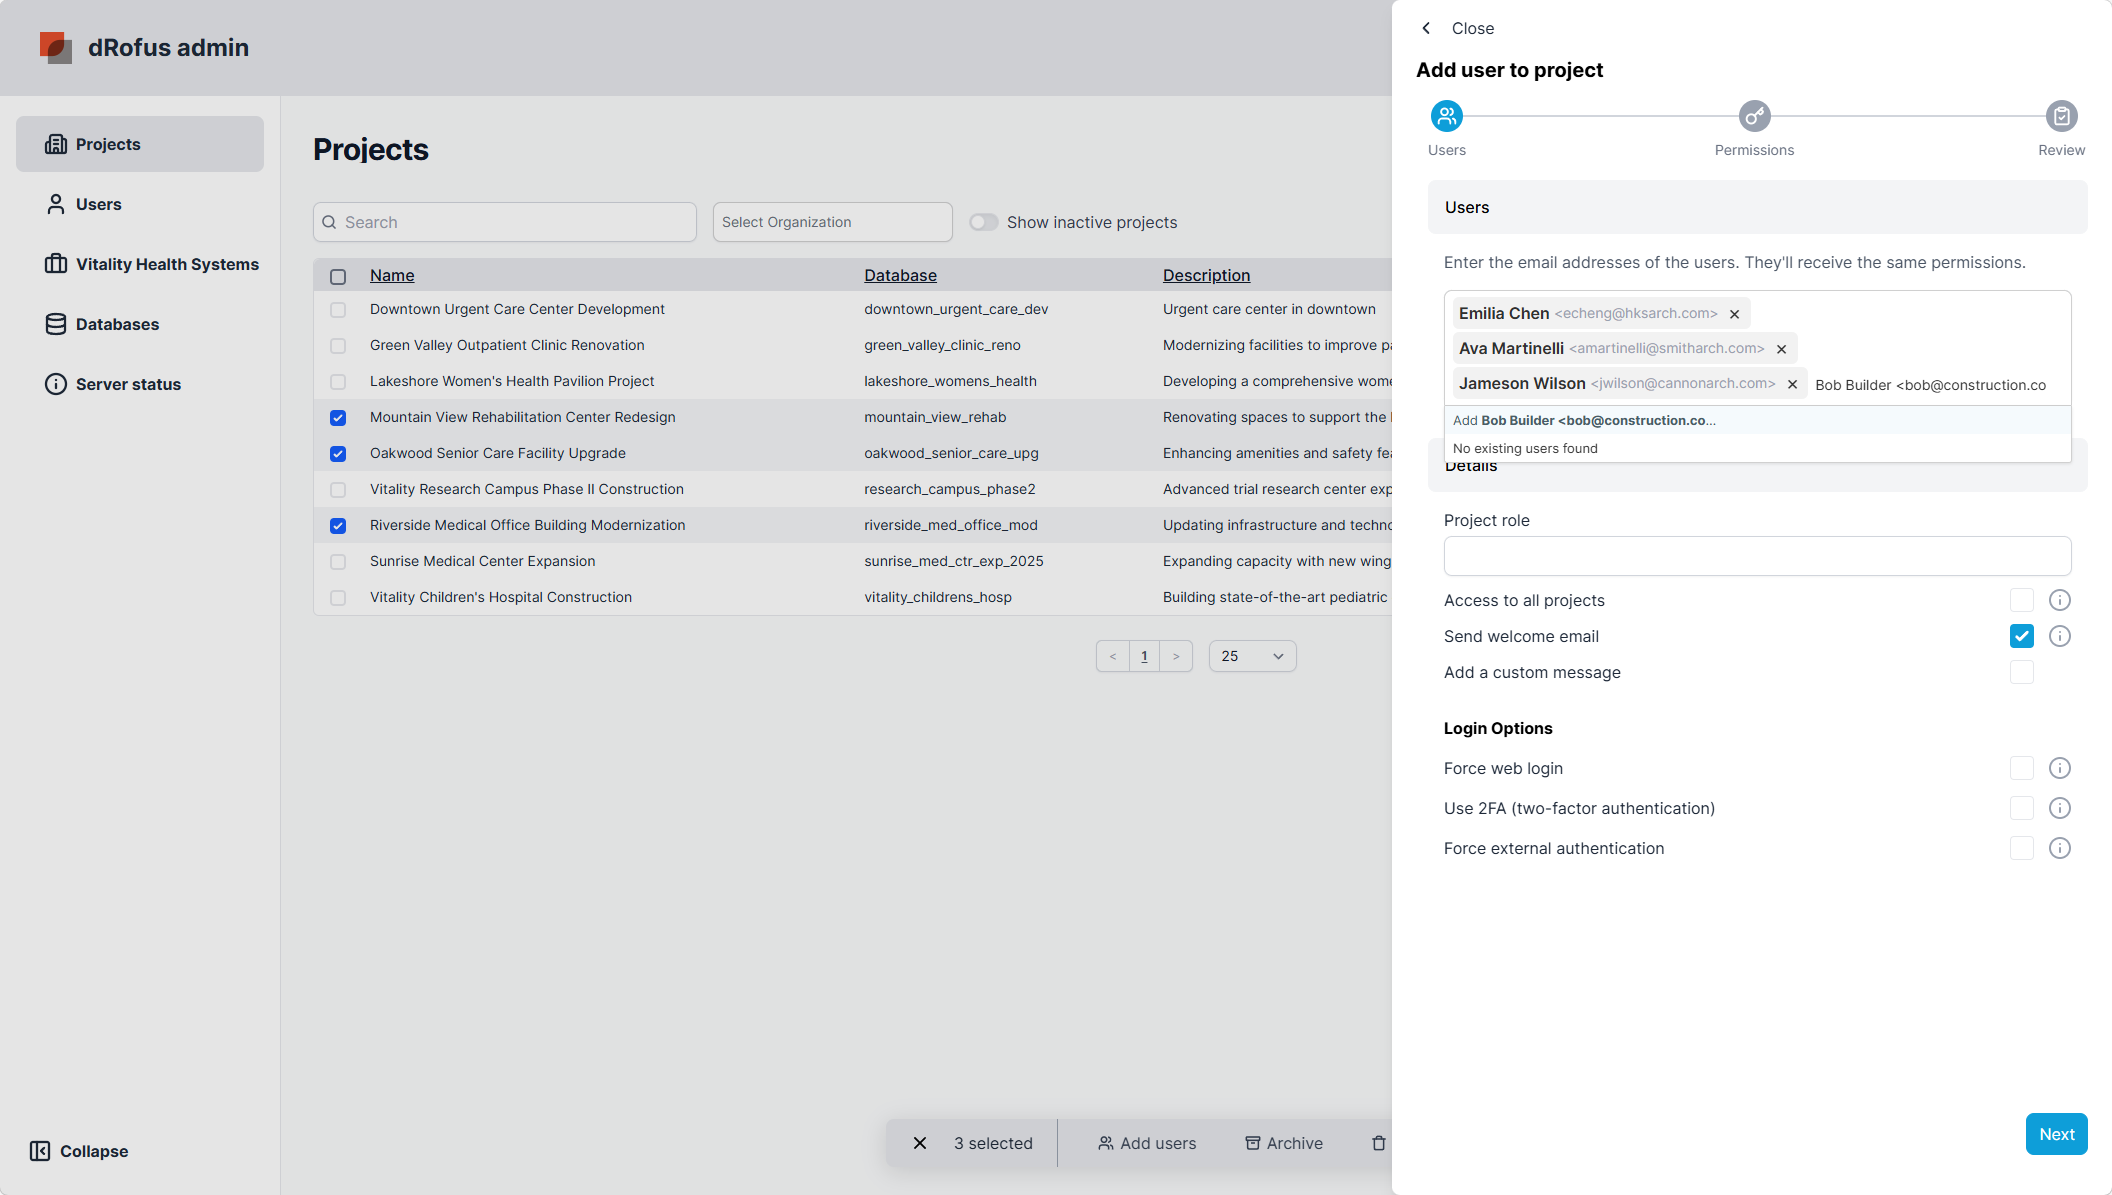
Add Users
Populate the Users list with emails of those who must be added to the Projects. If, as an Admin, you see the user while searching, select them to add them to the project. If they do not appear in the user list, add their first and last names to the email to populate those fields when creating new users. The format is Bob Builder < bob@construction.co>. When adding a new user to the list, select them after you have populated this format. Select Next once all users who share the same permissions have been added.
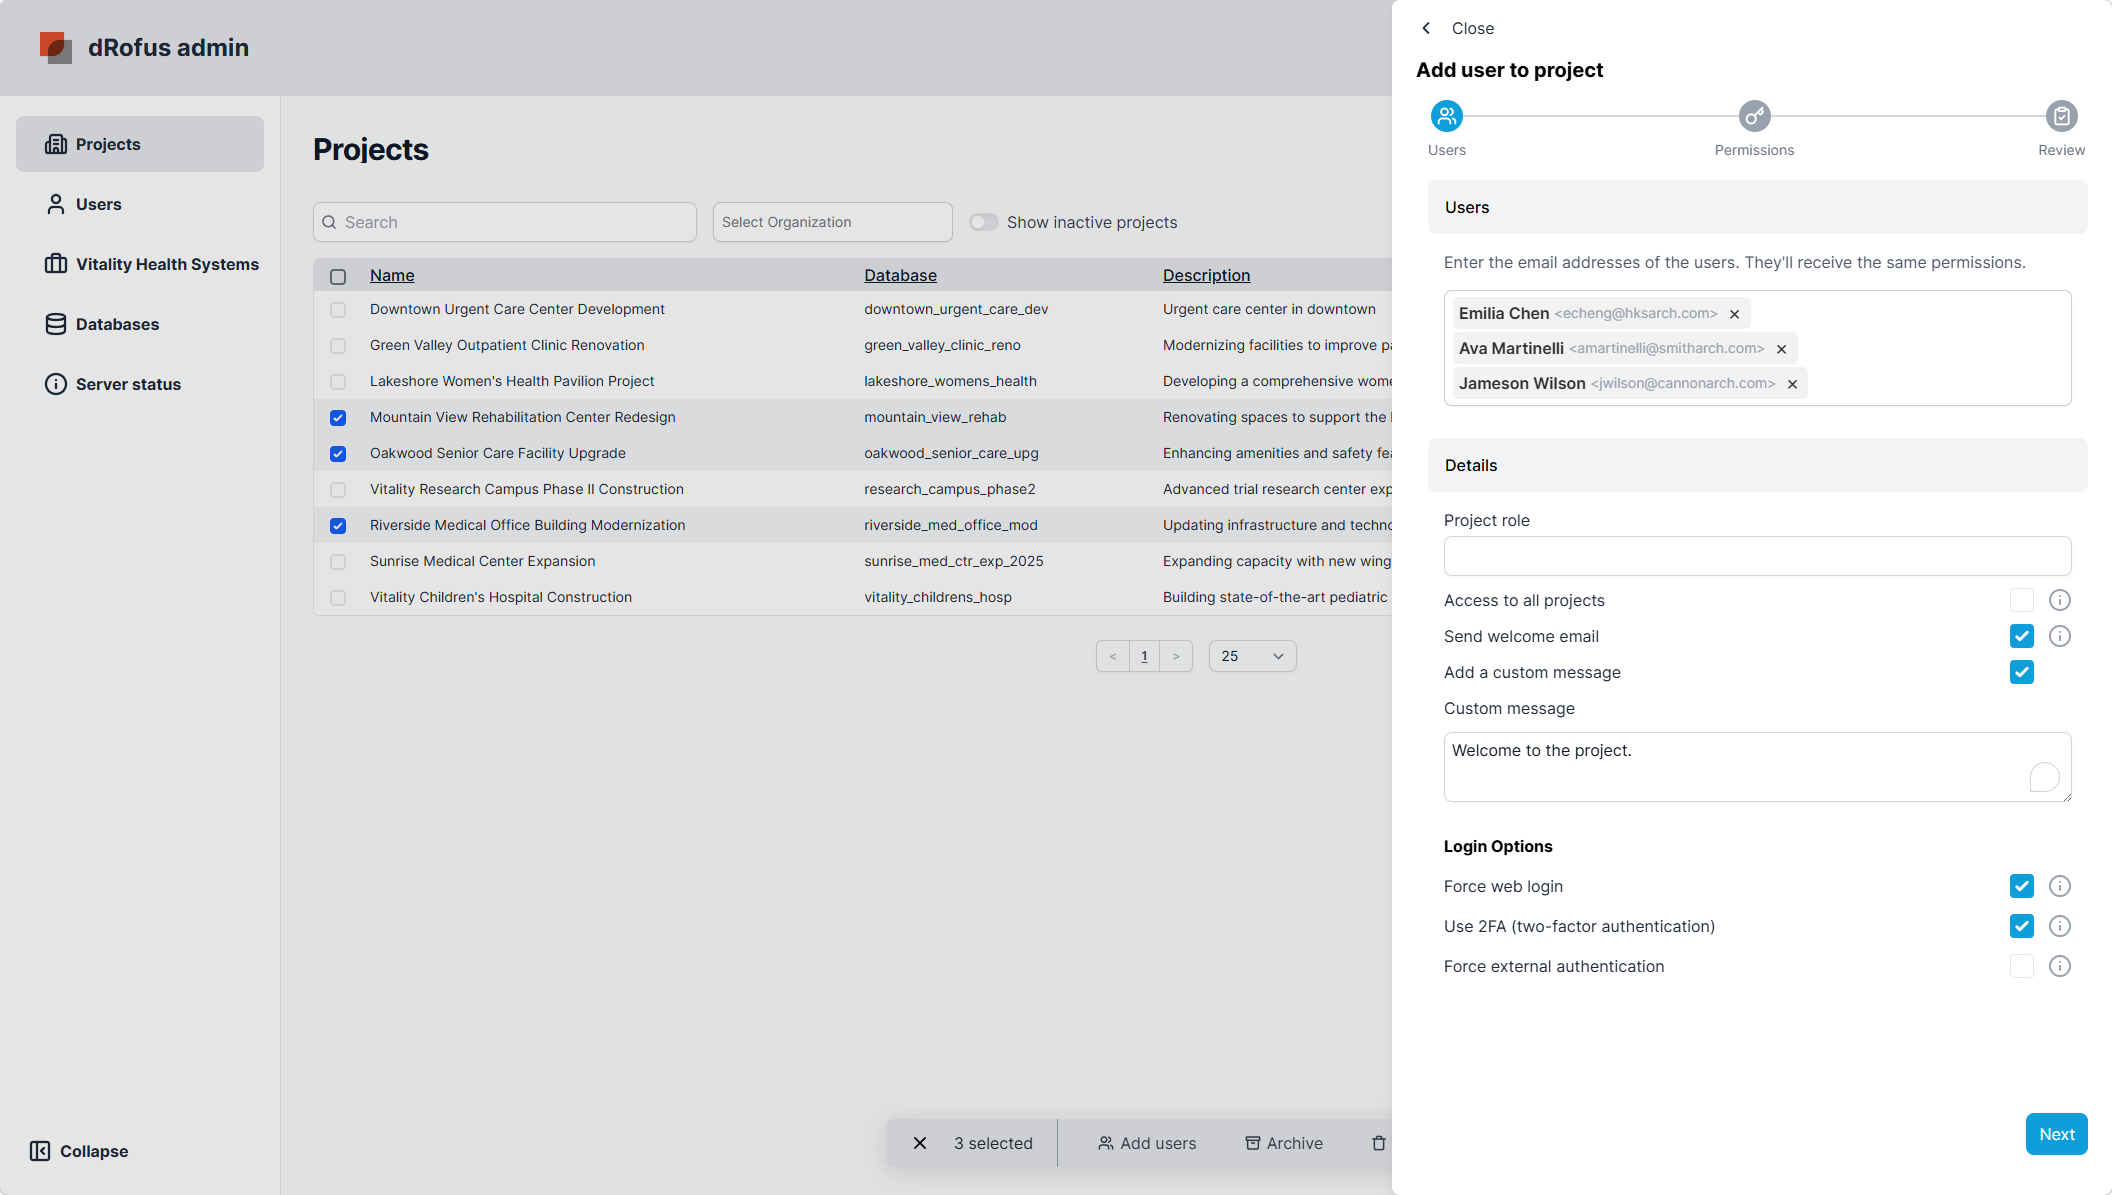
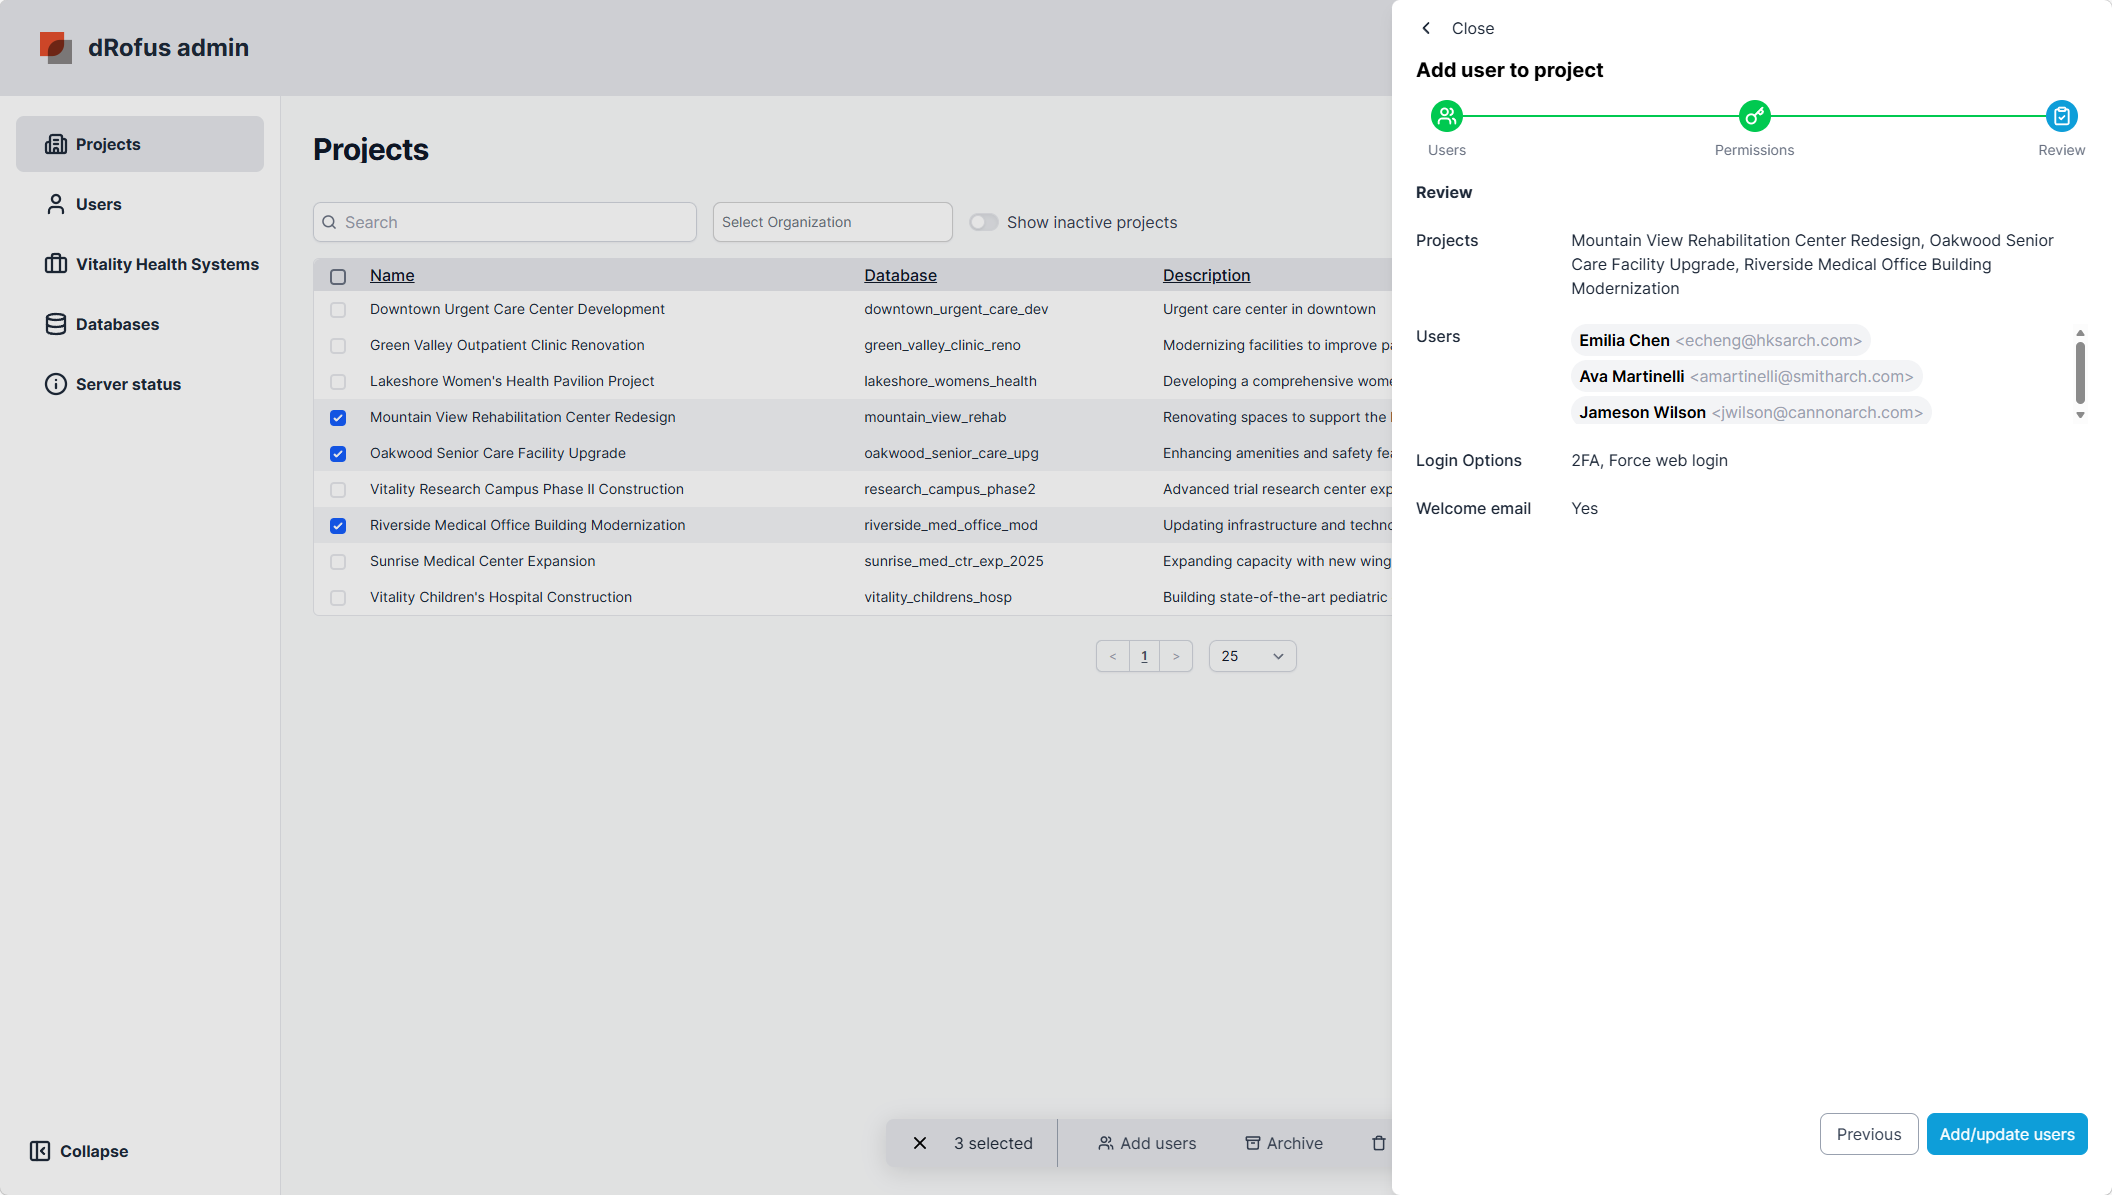
Review Options
Review details, keep “Send a welcome email” checked (on by default), and add any custom message (optional). Populate the Project Role. If you are adding new users, set their Login Options. These settings do not apply to users who already have accounts.
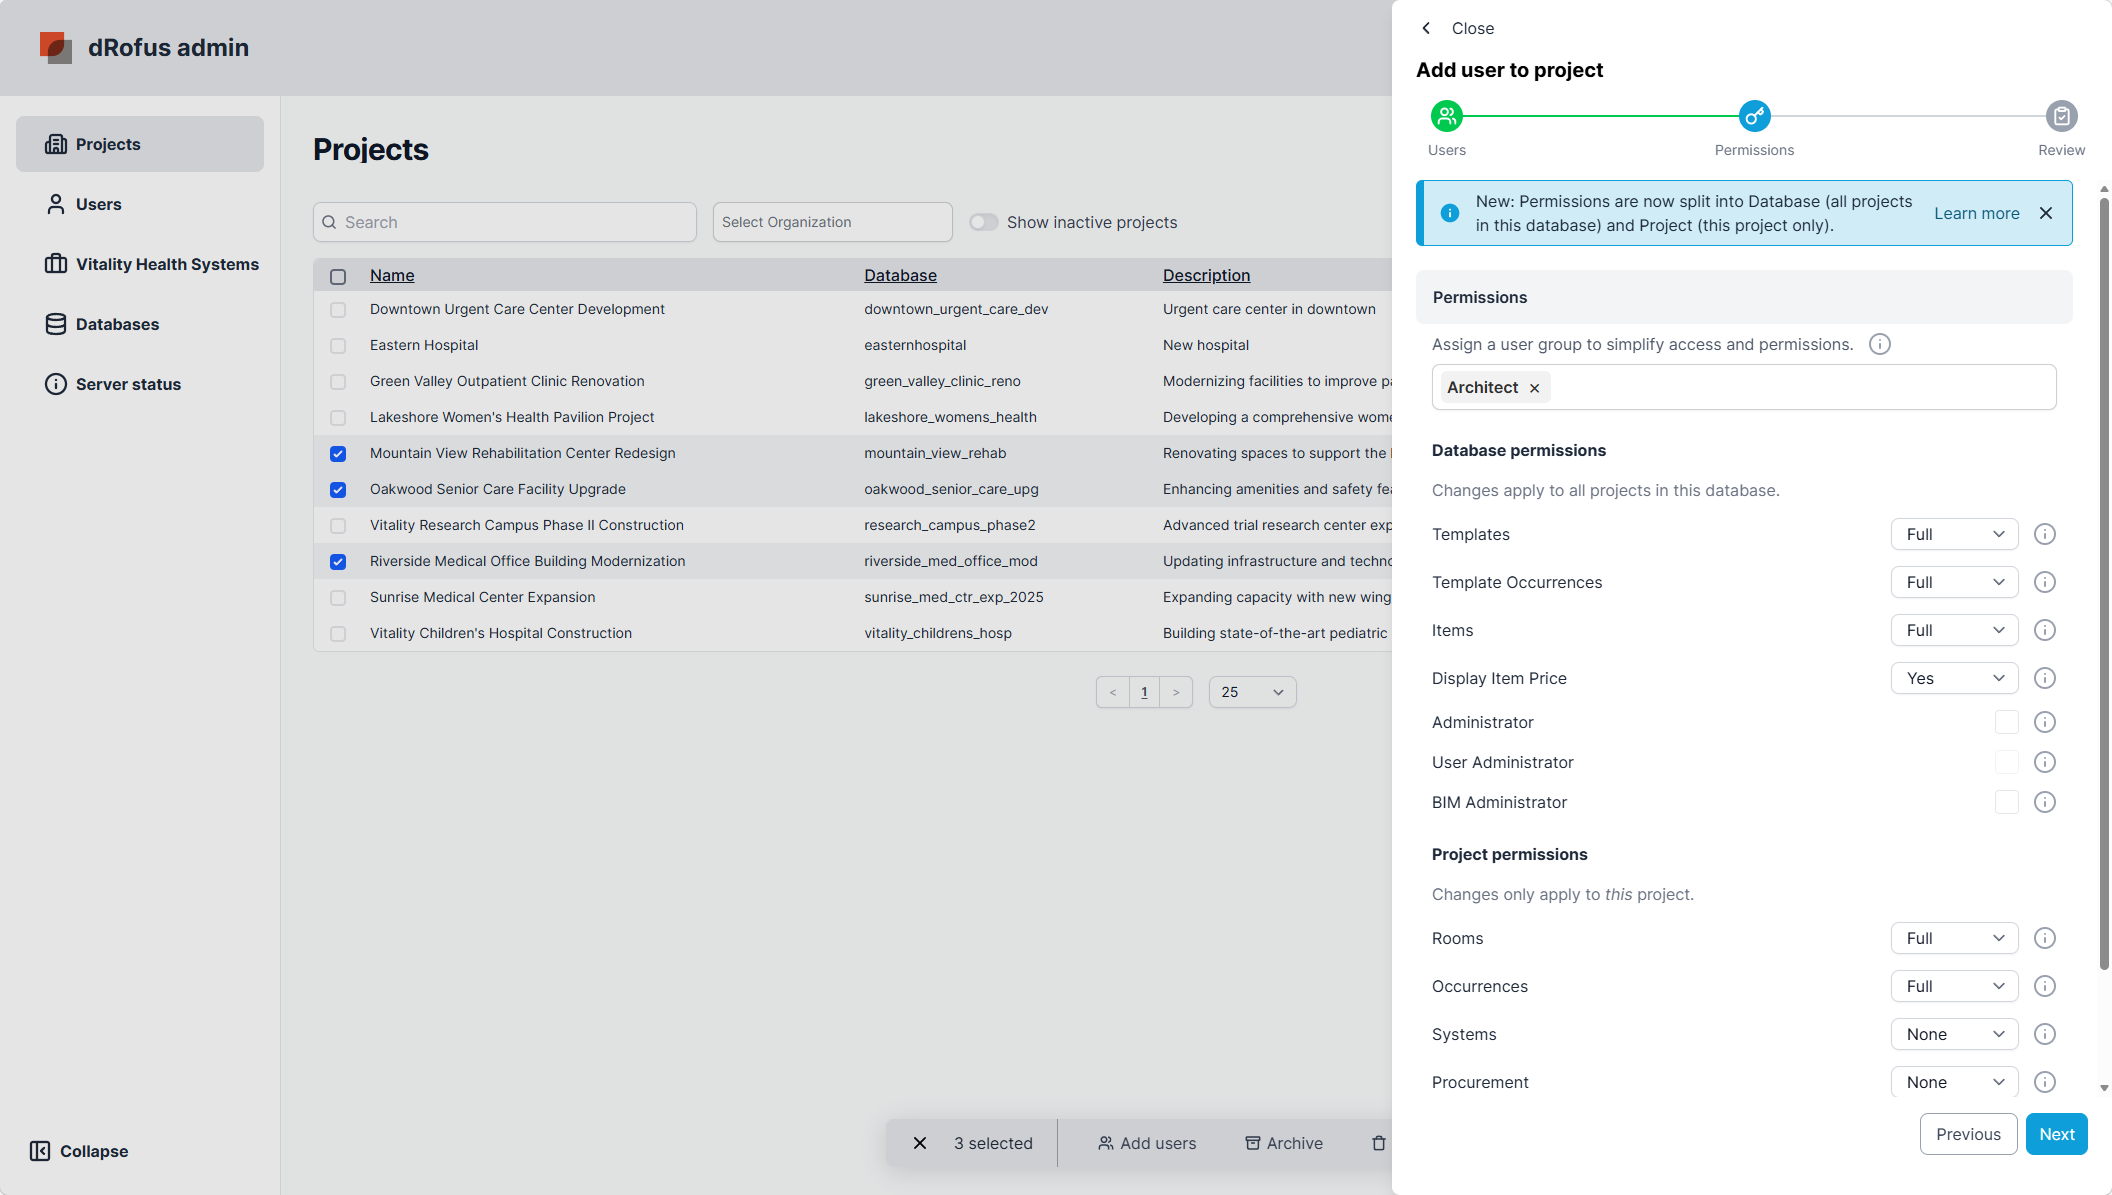
Define Permissions
Set the user group to define permissions or manually define permissions. Select Next to complete permissions for all the same users.
Review Summary
Last step before adding or updating users to a project. Check the project list, users, login options (for new users), and whether the welcome email is enabled.
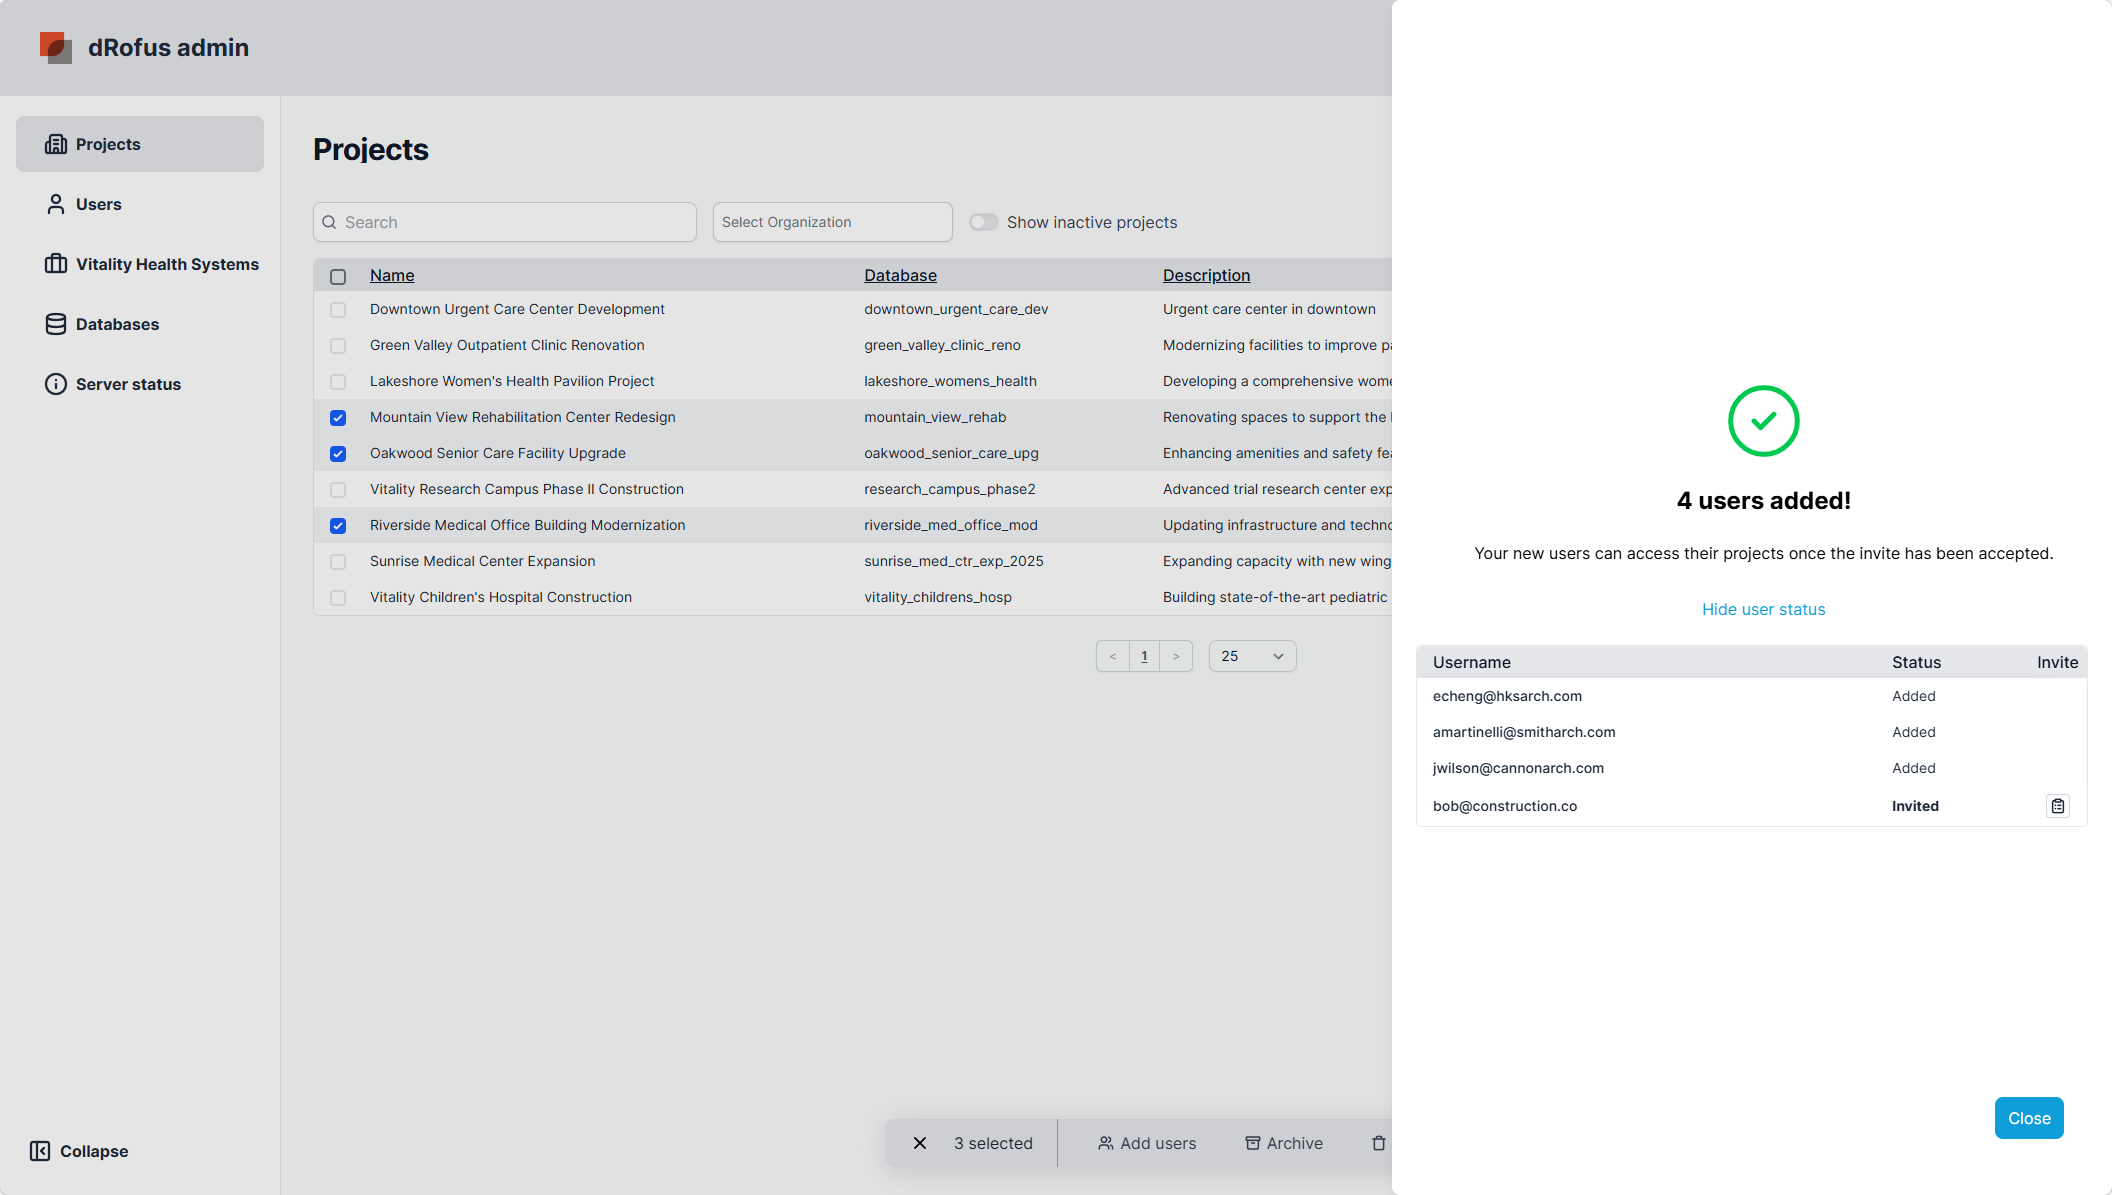
Users added to the project will show with the status “Added”. Users invited to join the project or create an account will show with the status “Invited”.
Next to the invited status is a copy feature that can be used to copy the URL from the invited email.
User Permission Levels
User rights define access to the project and control of a user's editing rights within the different dRofus modules. Hold the mouse cursor over the information icons to view help text explaining the various permissions. See Permissions
Full means the User has full editing permissions.
Limited means the User has some room data permissions only. Only applies to Room Templates and Rooms.
Read means the User will have read-only access and non-editing permission.
None means the User will have no permissions; in most cases, the module will not appear.
Model server
Users need full permission to upload or replace IFC files on the dRofus web.
Administration Levels
BIM Administrators can edit Attribute configurations in Revit, Archicad and IFC (Desktop) and update the Revit or Archicad settings.
Administrators can change settings and preferences in dRofus.
User Administrators provides access to the admin system, where users can change project details and edit user permissions.
Options for Adding New Users
As a project admin in dRofus, there are a few different ways to add users to your project. The method you use depends on whether the user already has an account and whether their account is visible to you as an admin.
Adding users visible to the admin
When you search for a user while adding them to a project, if their name appears in the search results, it means:
-
The user already has a dRofus account.
-
Their account is visible to you as an admin.
How to add:
-
Select the user from the search results and add them directly to the project.
-
By default, the "Send welcome email" option is checked, so the user will receive a notification email.
-
In the Summary Review, these users will show with the status "Added".
Invite users Who Are Not Visible to the Admin (Sending Invitation Emails)
If the user does not appear in the search results, it means:
-
The user does not have a dRofus account, or
-
The user has an account, but it is not visible to you as an admin.
How to invite:
-
Enter the user's email address to send them an invitation.
-
The "Send welcome email" option is checked by default, so an invitation email is sent automatically.
-
The user's status in the Summary Review will be "Invited".
What happens next:
-
If the user already has an account, they will be prompted to accept the project invitation via the Account App.
-
If the user does not have an account, they will be prompted to create one and then accept the invitation via the Account App.