.png)
Inviting users
When inviting users to join a project (see Add New Users | Using Invitations) the admin does not know if the user has an account. This is to protect the user's details. Previously, admins had to submit a support ticket to add existing users to their projects, so we could add them on their behalf. This is no longer necessary with invitations.
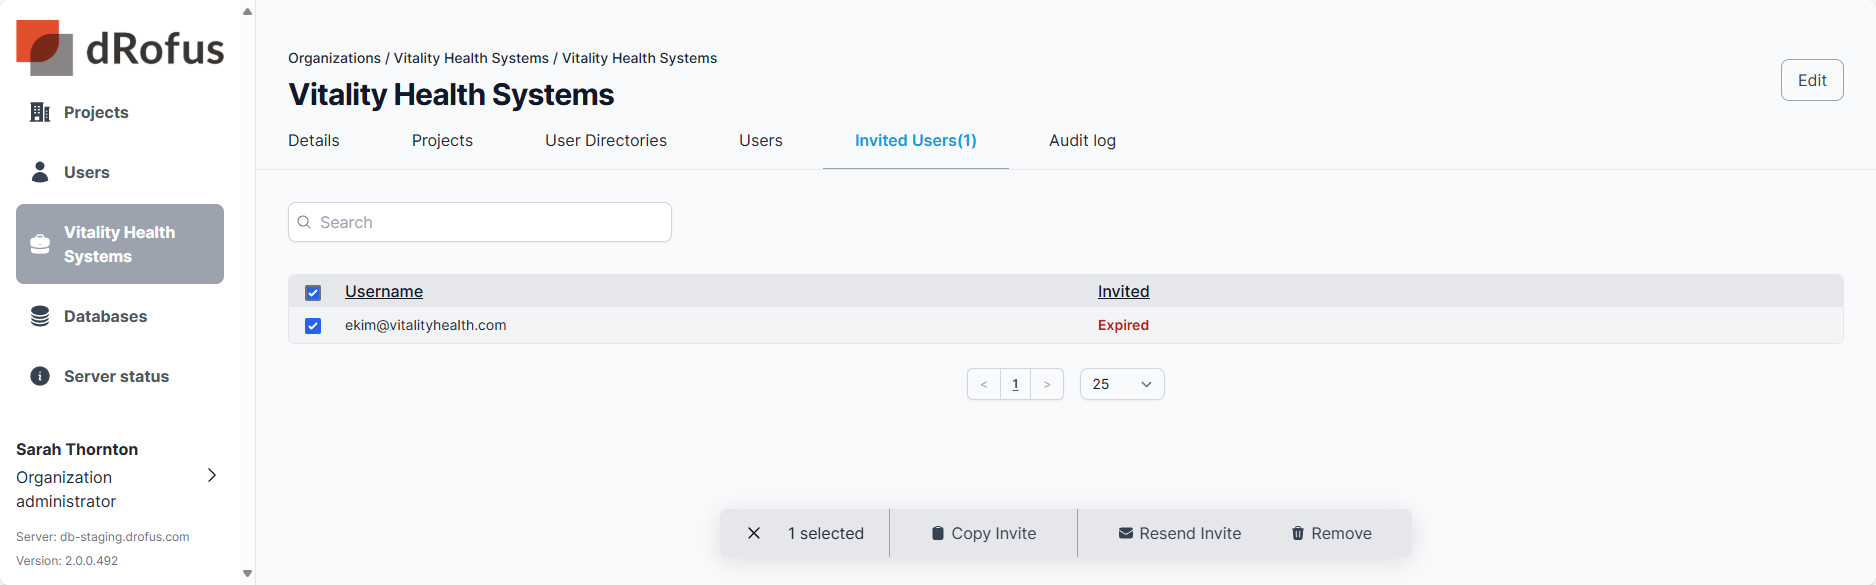
The admin will see a list of users who have either not created an account or have not yet accepted the invitation to join the project. This will show in the “Invited Users” tab (see screenshot further down). To resend an invitation, select the user and choose “Resend Invite” in the bottom menu. The Invited Users tab will not show if all users have been created and accepted the invitation.
Invitations are limited to 7 days. If they expire, the admin can resend the invitation with a new security token.
New user invites expire. Existing users' invites do not.
See Invitation to Create or Join | Expired Invites
Project Invited Users
Invited Users: The admin has access to only the email, user group, and date/time of the invitation. In the project, invited users are displayed in the Invited Users tab until they join the project.
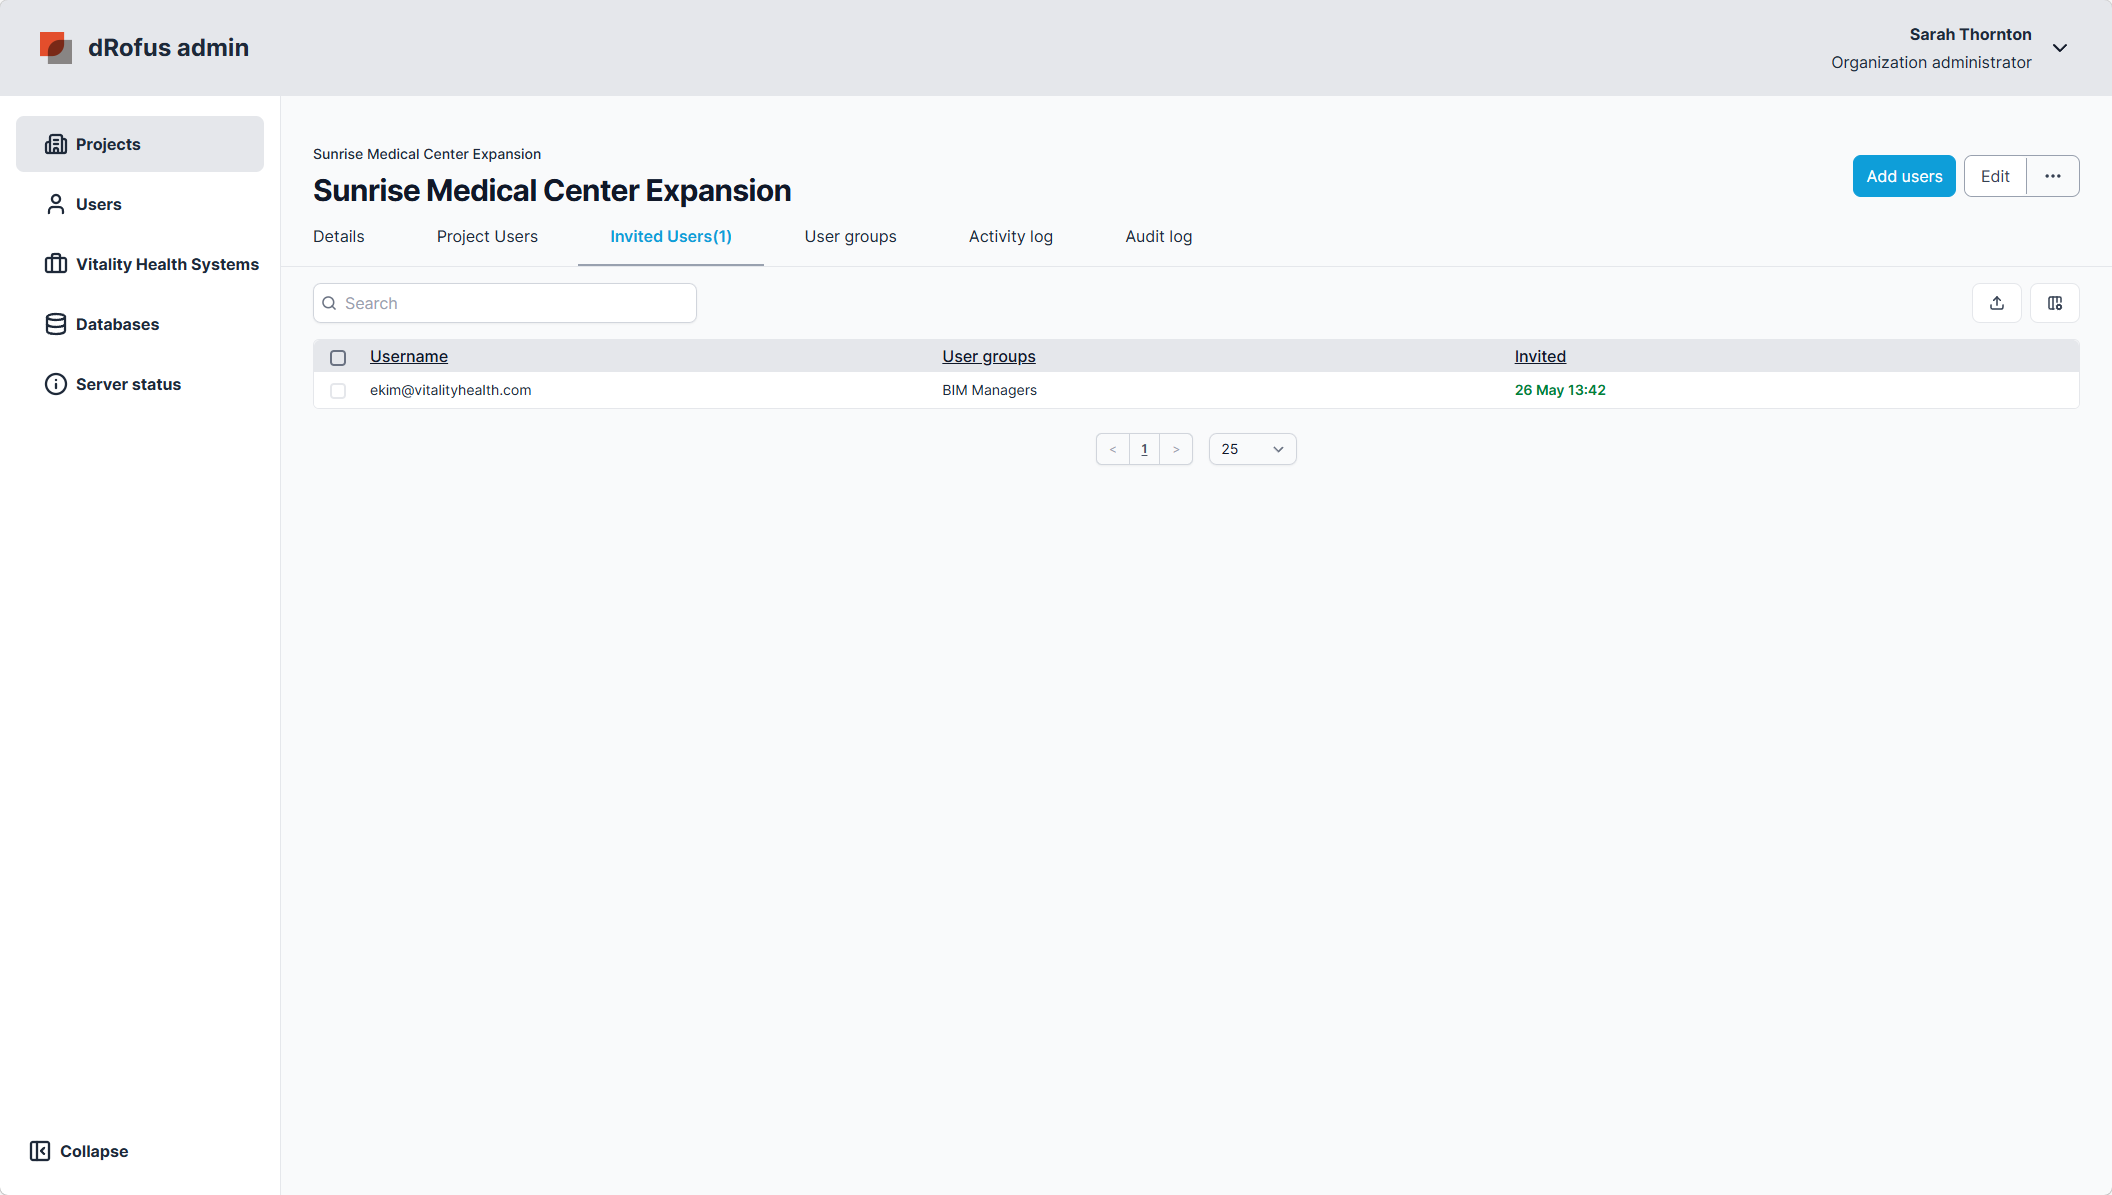
Organization Invited Users
Invited Users across multiple projects under the same Organization will show in the Invited Users tab within the Organization. Organization Administrators can select these users and resend the invites if they expire or upon request. Invited users can also be removed before an invitation is accepted. If the invited user attempts to accept or join a project after being removed, the invitation will no longer be valid. Only new users without an account will see their invite expire. Project and Organization admins can also use “Copy Invite” to share via a personal email or chat, similar to the Resend Invite option when selecting an Invited User from the list.

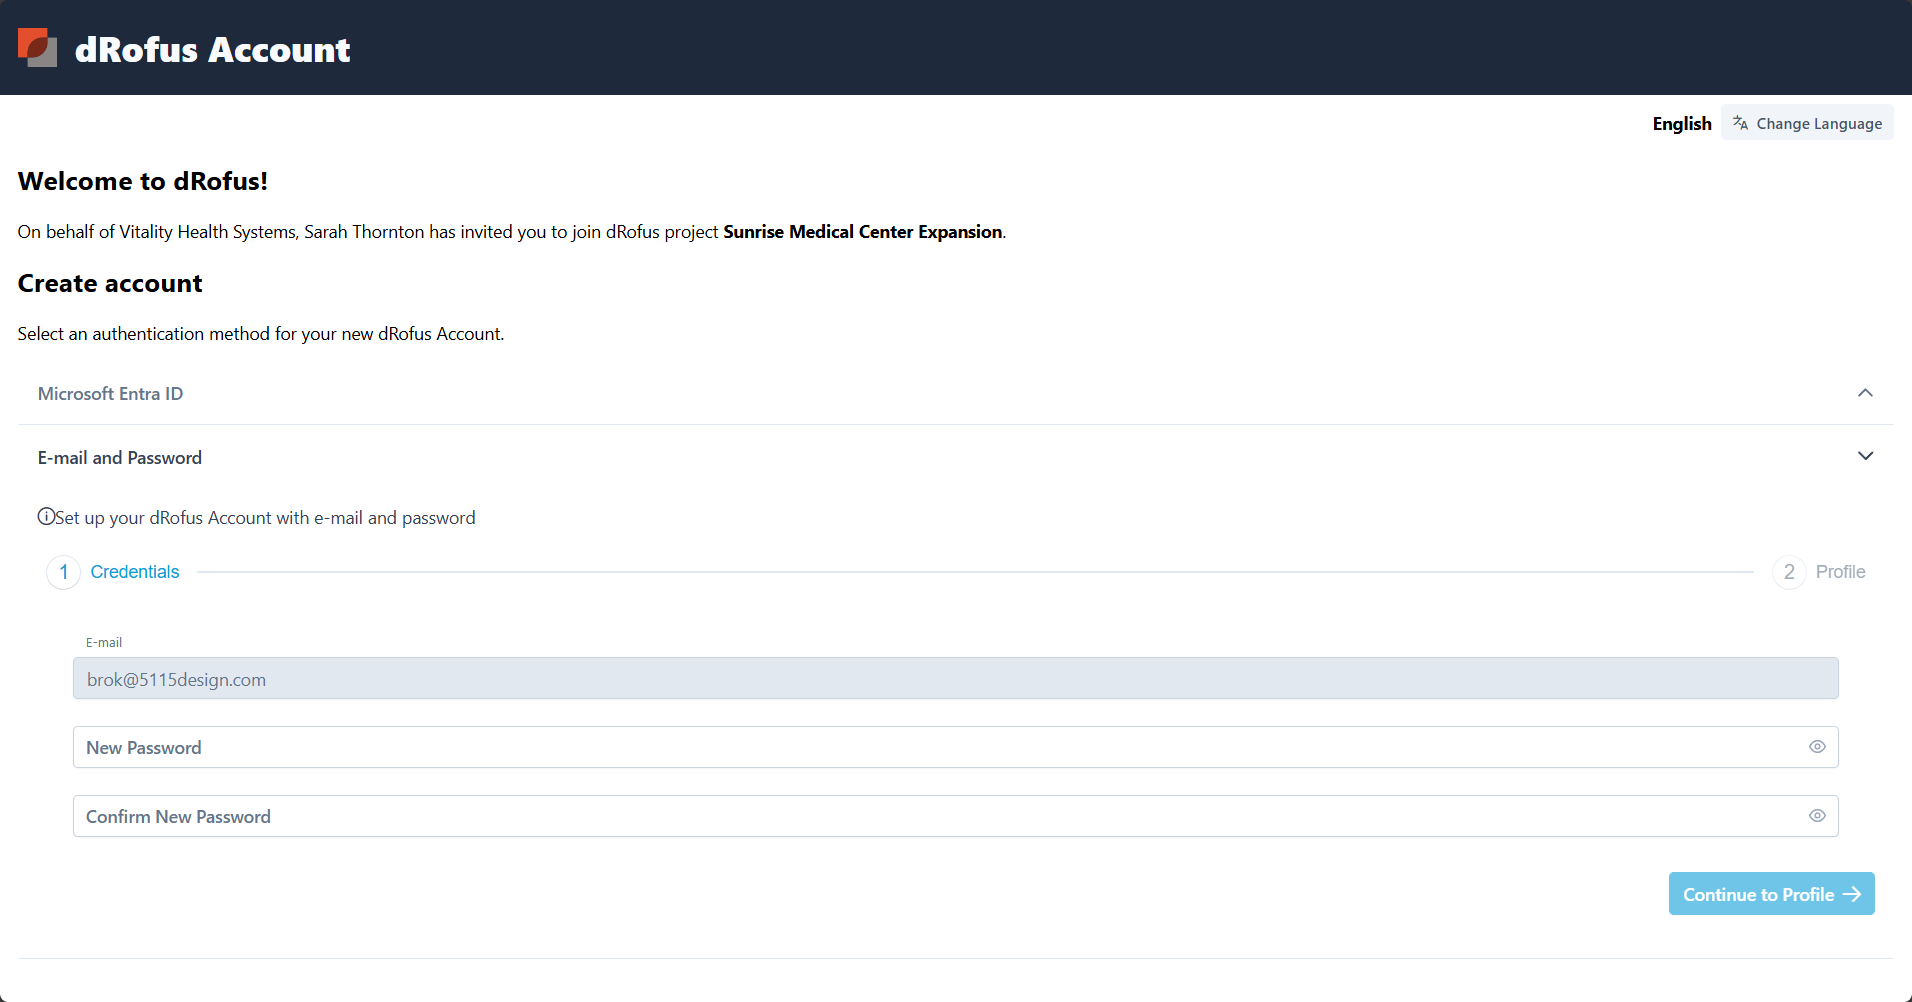
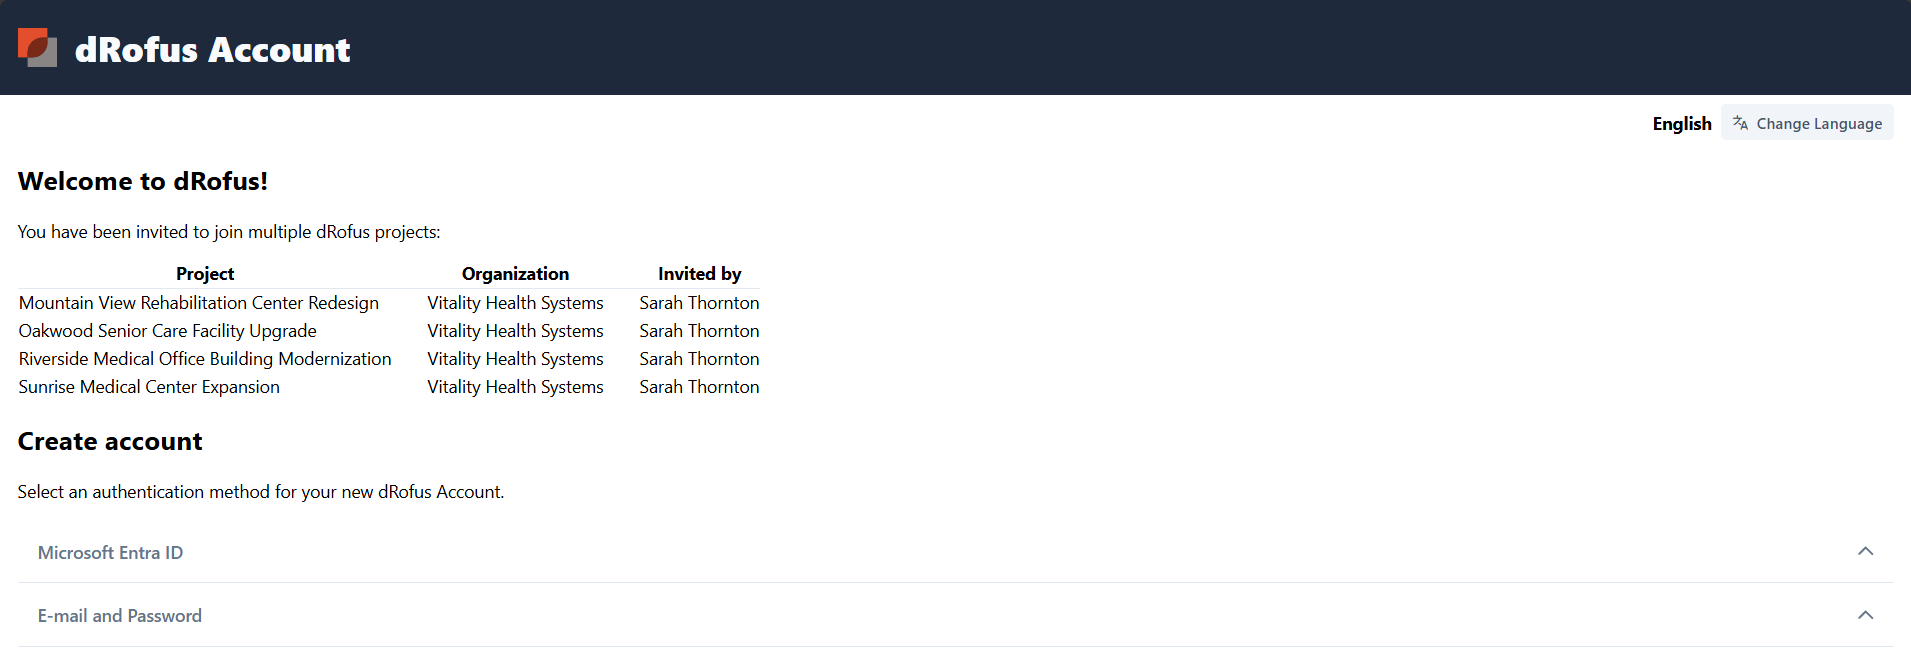
Create Account
Invitation to Create Account
Those receiving an invitation from the admin will be asked to create an account.
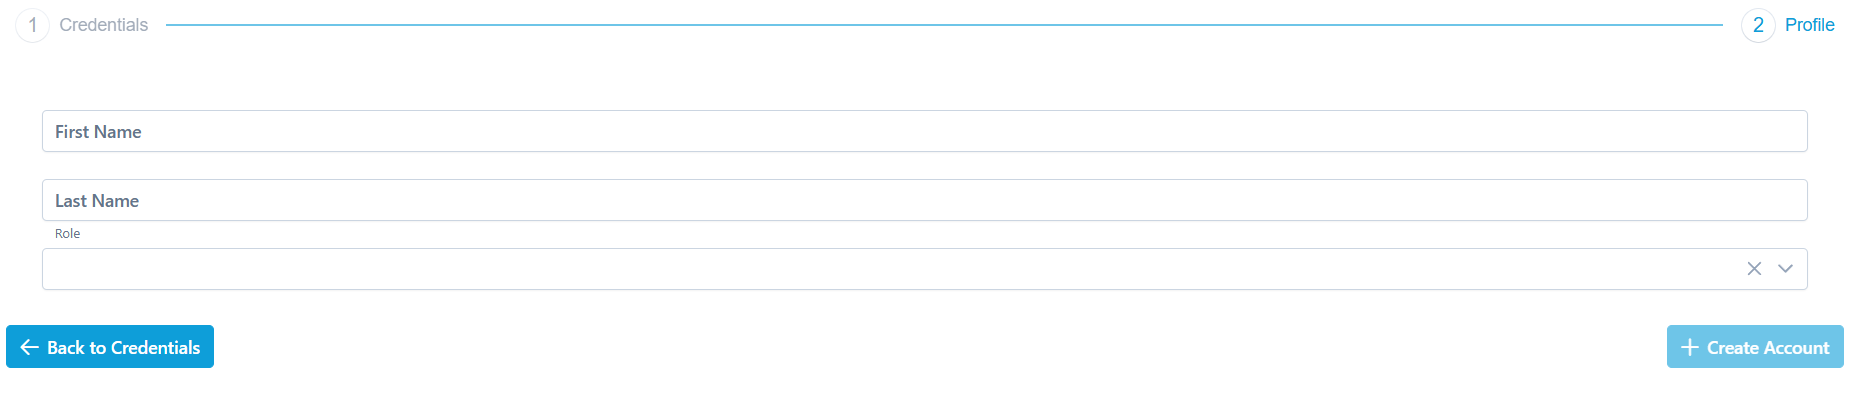
Complete setting up the User Account
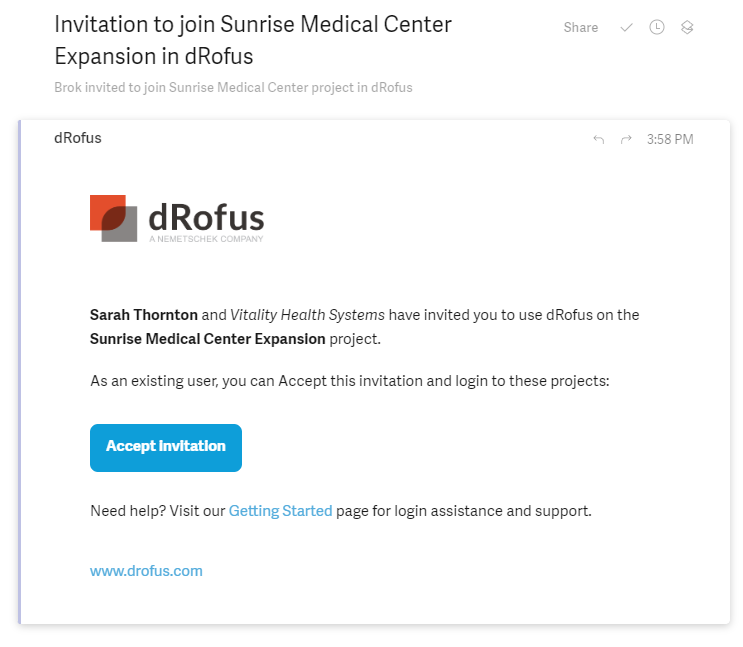
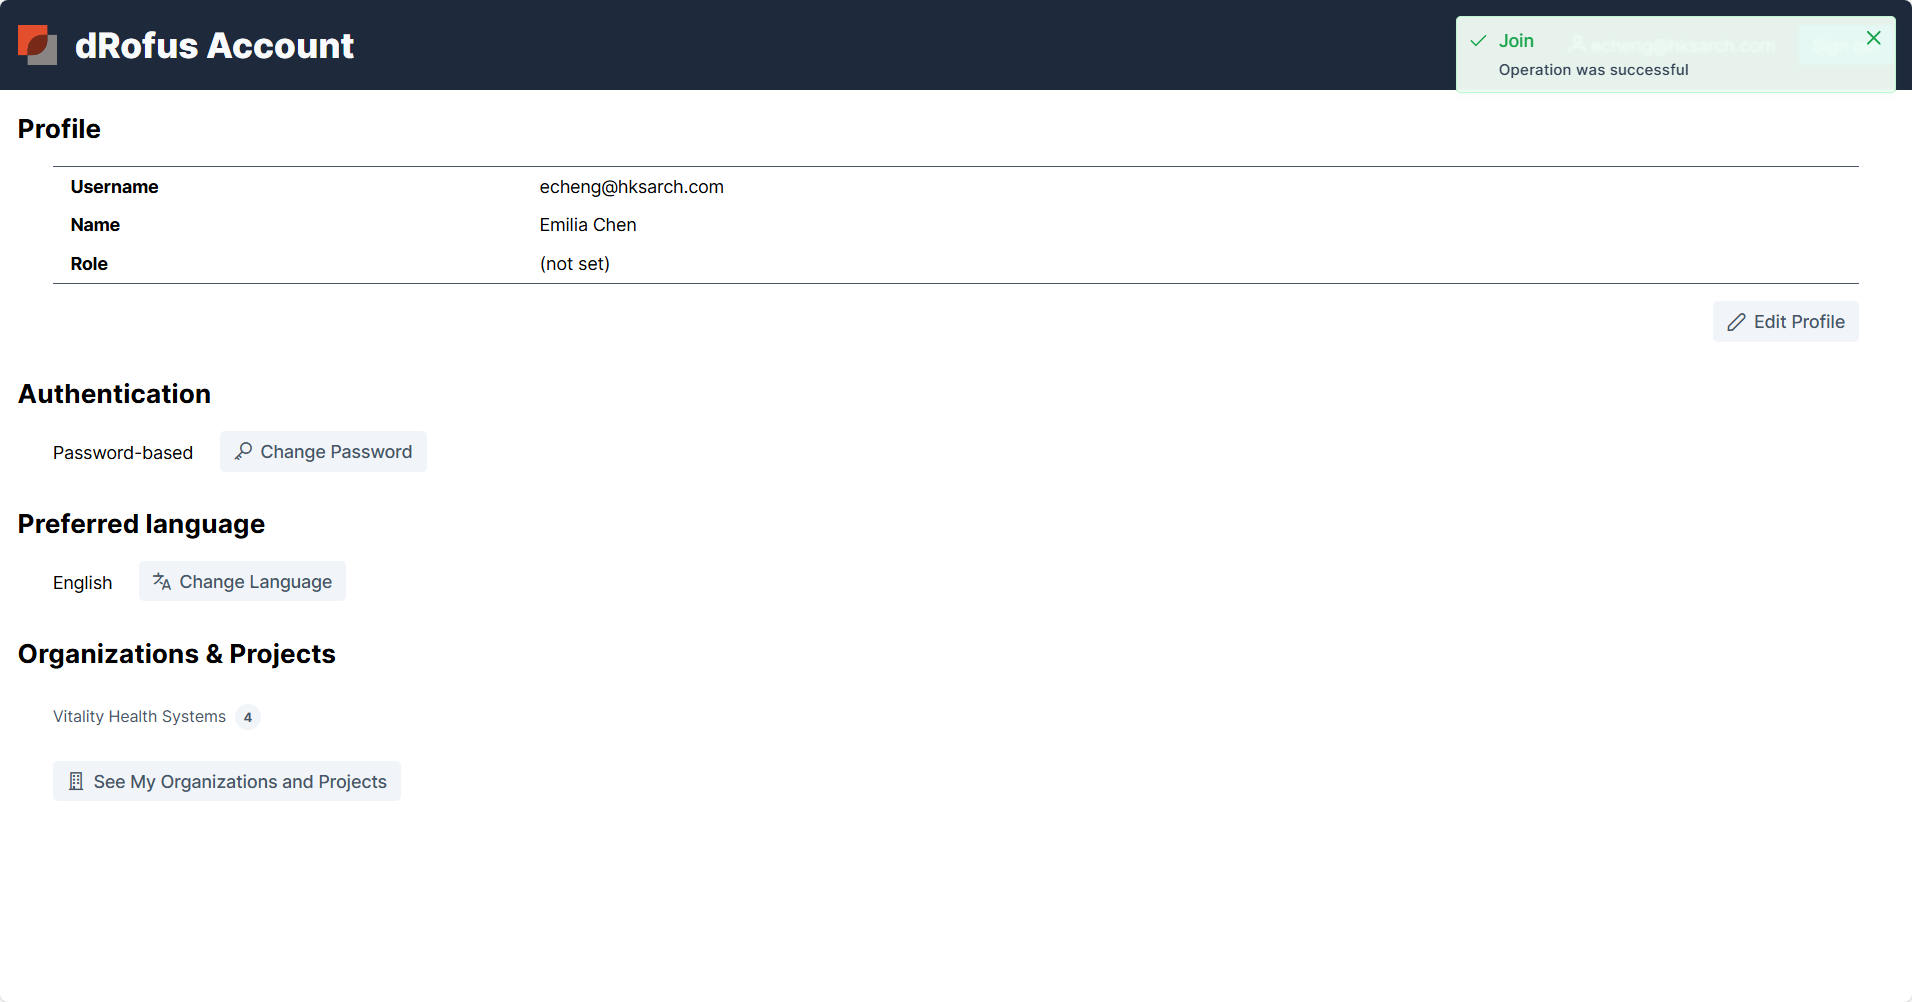
Users select Accept Invitation in the welcome email to complete account creation via the Account App. See Account App
IT Pre-Approval
dRofus Entra ID integration requests only low-impact permissions (openid and profile scopes). By default, these do not require consent from the organization’s Entra ID administrator.
First Request Approval
However, organizations can change this default, so an administrator’s consent might be required even for low-impact permissions. In such a case, an administrator can pre-approve (consent in advance). Otherwise, the first user attempts to authenticate via the dRofus Entra ID solution, and will see an Approval required prompt. This will also notify the administrator. For more details, see Consent experience for applications in Microsoft Entra ID - Microsoft identity platform | Microsoft Learn
Pre Approval
It is also possible for administrators to pre-authorize, which allows them to pre-consent the dRofus Entra ID solution. An administrator's consent will result in users not being prompted for consent, even in scenarios where administrator consent is not required.
The easiest way to do so is to visit the dedicated consent page. The URL template for this is: https://login.microsoftonline.com/{organization_id}/adminconsent?client_id=7e31cb5e-4a4a-42a8-9662-4d35c9ce7488, where {organization_id} should be replaced with the destination organization's tenant ID. Hint: this is a UUID. For more details, see Grant tenant-wide admin consent to an application - Microsoft Entra ID | Microsoft Learn
Additional Information
dRofus access via Microsoft Entra ID is only used to confirm that the user is who they say they are.
dRofus supports 2FA - see how it works:
-
https://help.drofus.com/en/English/Learning/enable-two-factor-authentication-for-users
-
https://help.drofus.com/en/English/Learning/two-factor-authentication-2fa-using-one-time-passw
dRofus supports user directory synchronization and SSO setup for organizations using Azure AD:
Reference dRofus security and data protection documentation:
The Microsoft Entra ID email must match the invitation email. The Microsoft email must be a business account.
Using Email with Password

To define the names, use this format in the admin system: John Wayne <jw@cowboy.com>

If the user is invited to several projects at once, they will be listed in the create account process.
Creating the account will then navigate the newly created user to the Account App.
Accept Invitation
Invitation to Join a Project
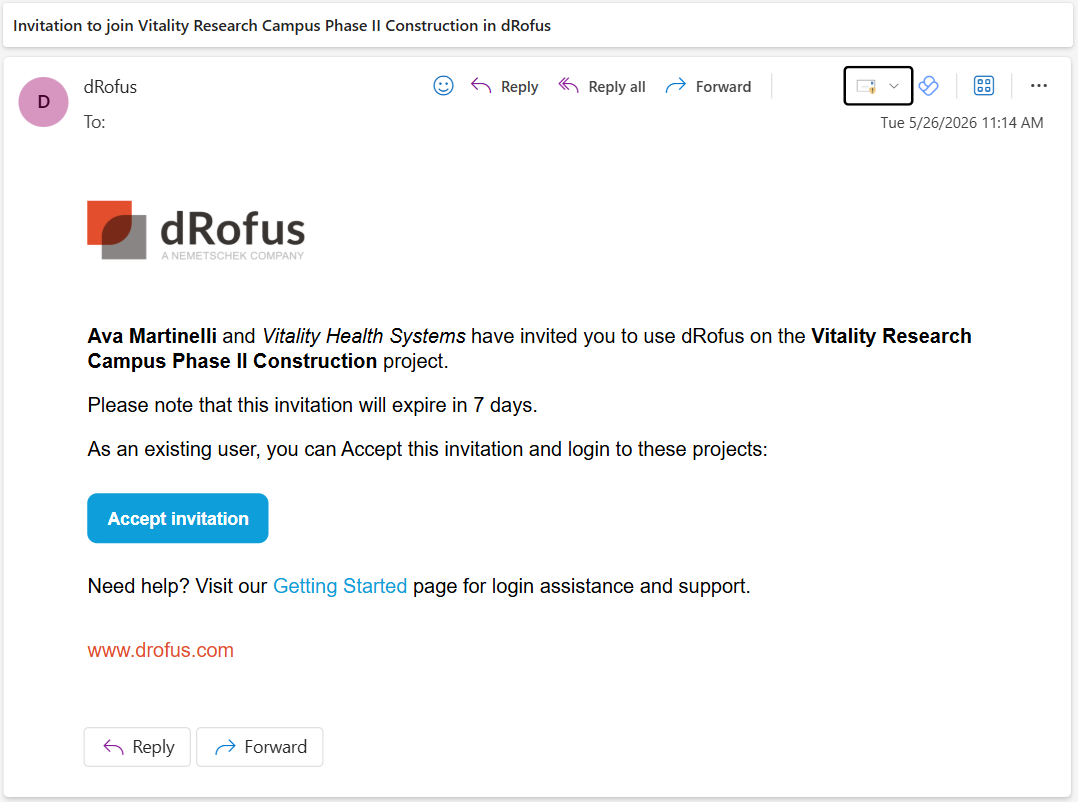
When the admin invites a user with an account, the email and process are different since there is no need to create an account. Instead, the user is invited to join the project.
Accepting invitations allows the users to opt in to access the project and leave the project.
Those receiving an invitation from the admin will be asked to accept the invitation.
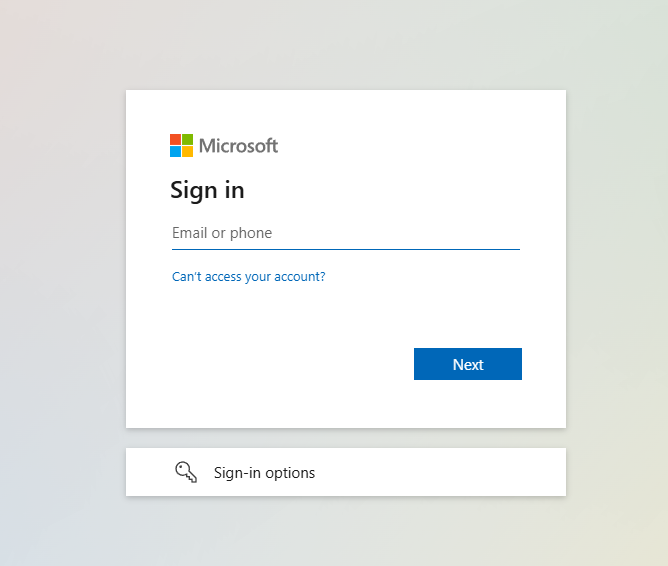
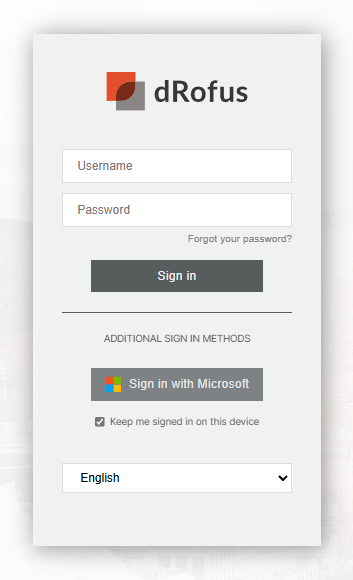
Step 1: Sign in to confirm you have an account

Step 2: Accept or Reject Invitations
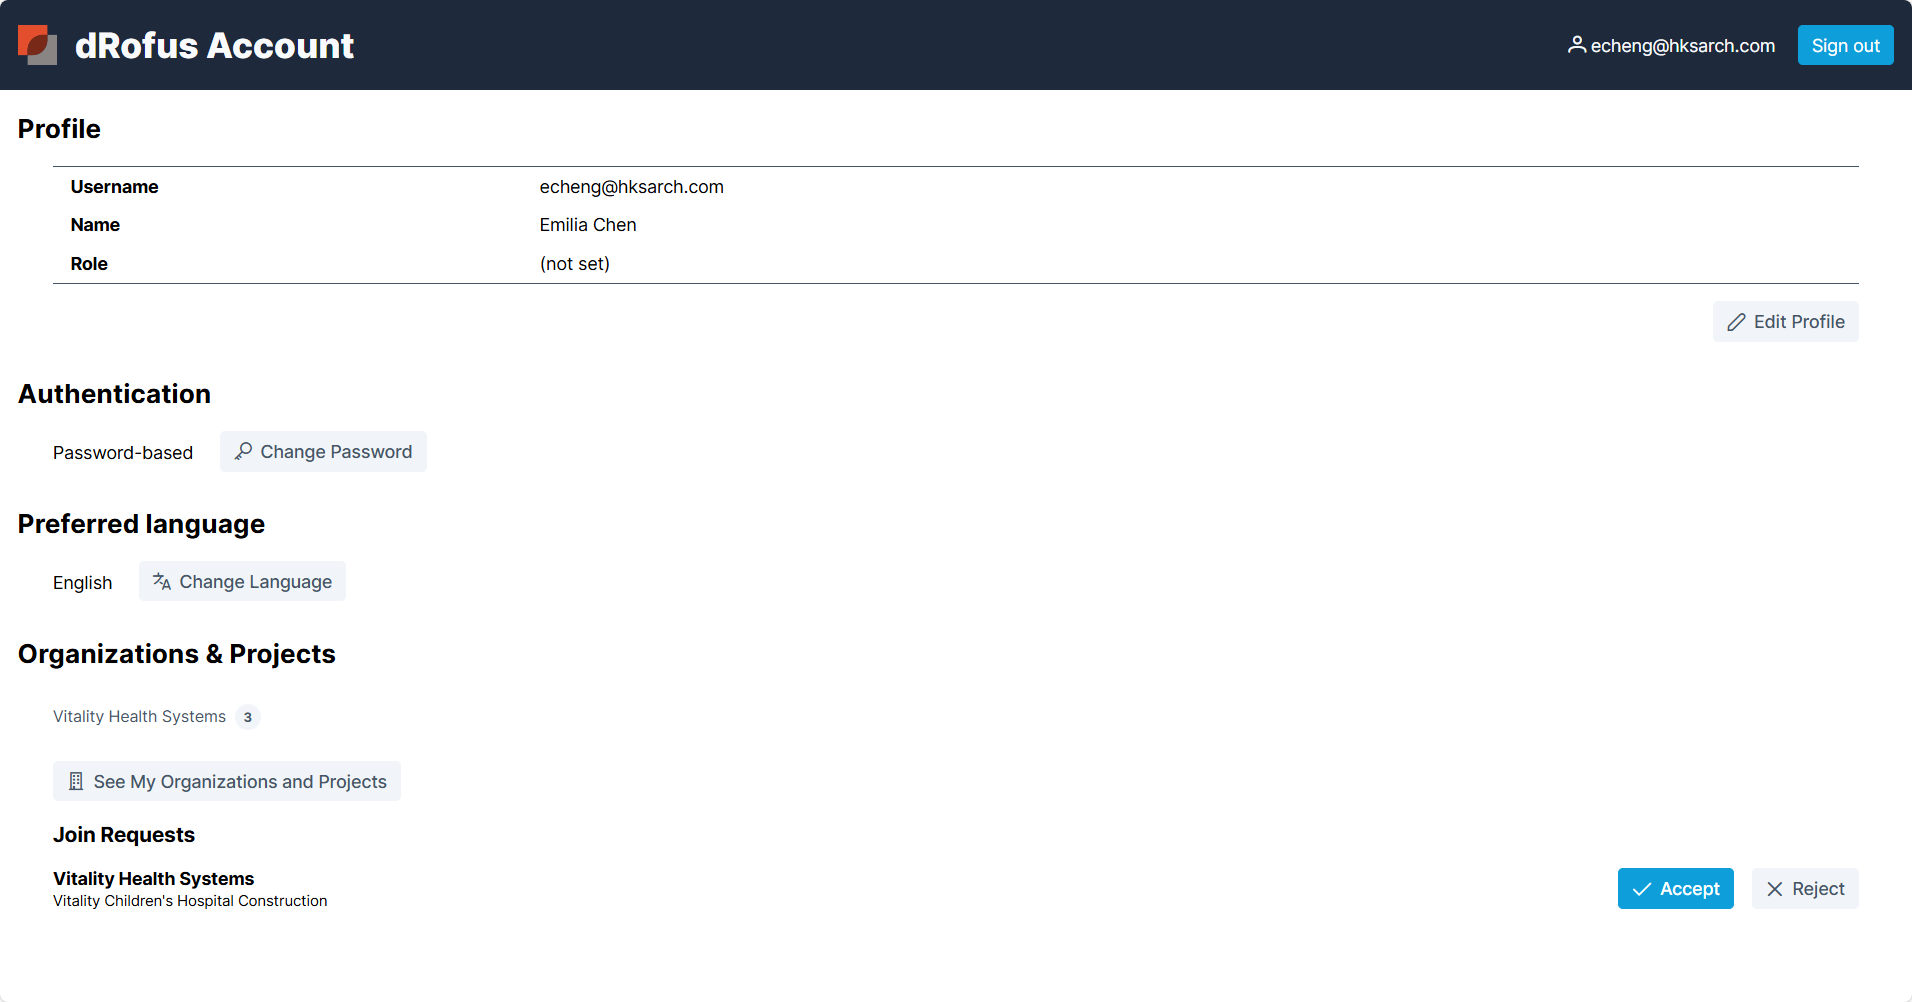
Accepting to join a project will show the project in the list via the Organizations and Projects area in the Account App.
Expired Invites
Project, Organization and Server Admins can Resend invites for users who’s invitations expired. Unused invite security tokens will expire after 7 days. Selecting the user and then Resend invite will send a new email with a new invite token. Alternatively, use the Copy Invite option to paste it into a message to the user.