.png)
Recommended knowledge:
Steps that should be completed before moving forward:
-
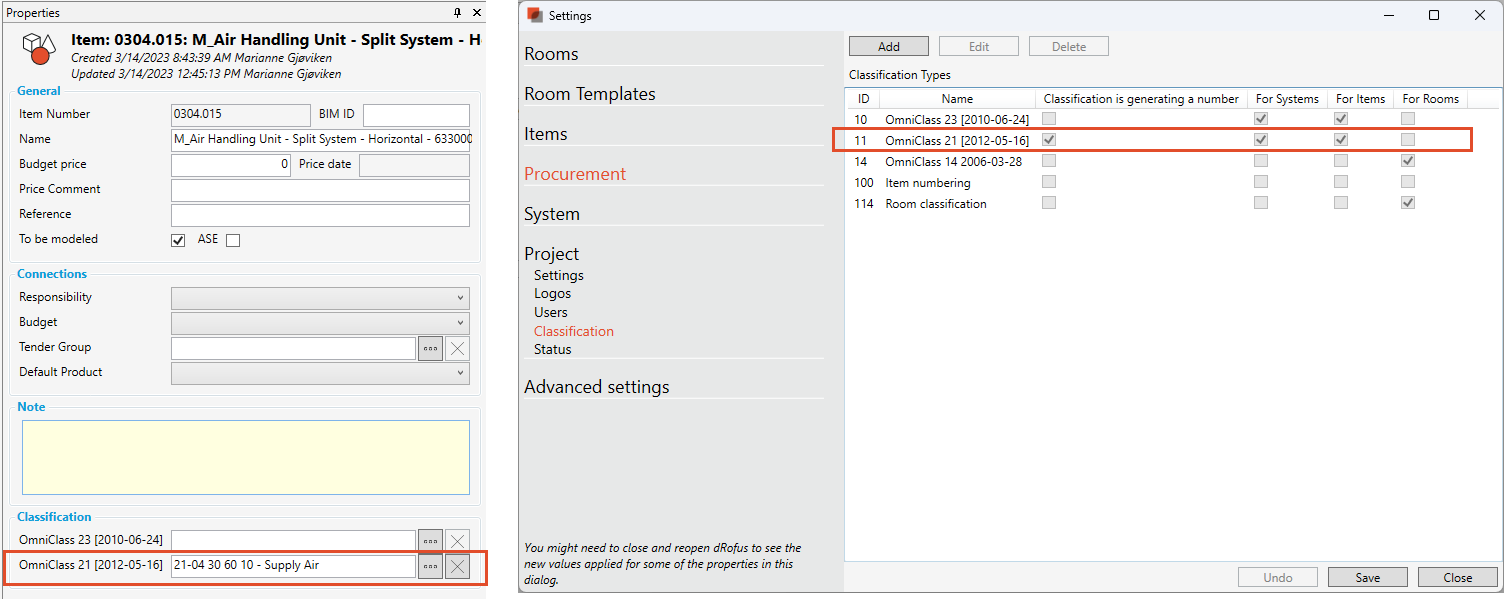
Set Attribute Configuration for Item, Occurrences and systems
-
Link Family types and Items
-
Link systems that exists both Revit and dRofus. If the system already exist in dRofus, you need to first link the systems: Link System in Revit with Planned Systems in dRofus
-
Add number giving classification to the Item in dRofus that are linked to be used as the System Component
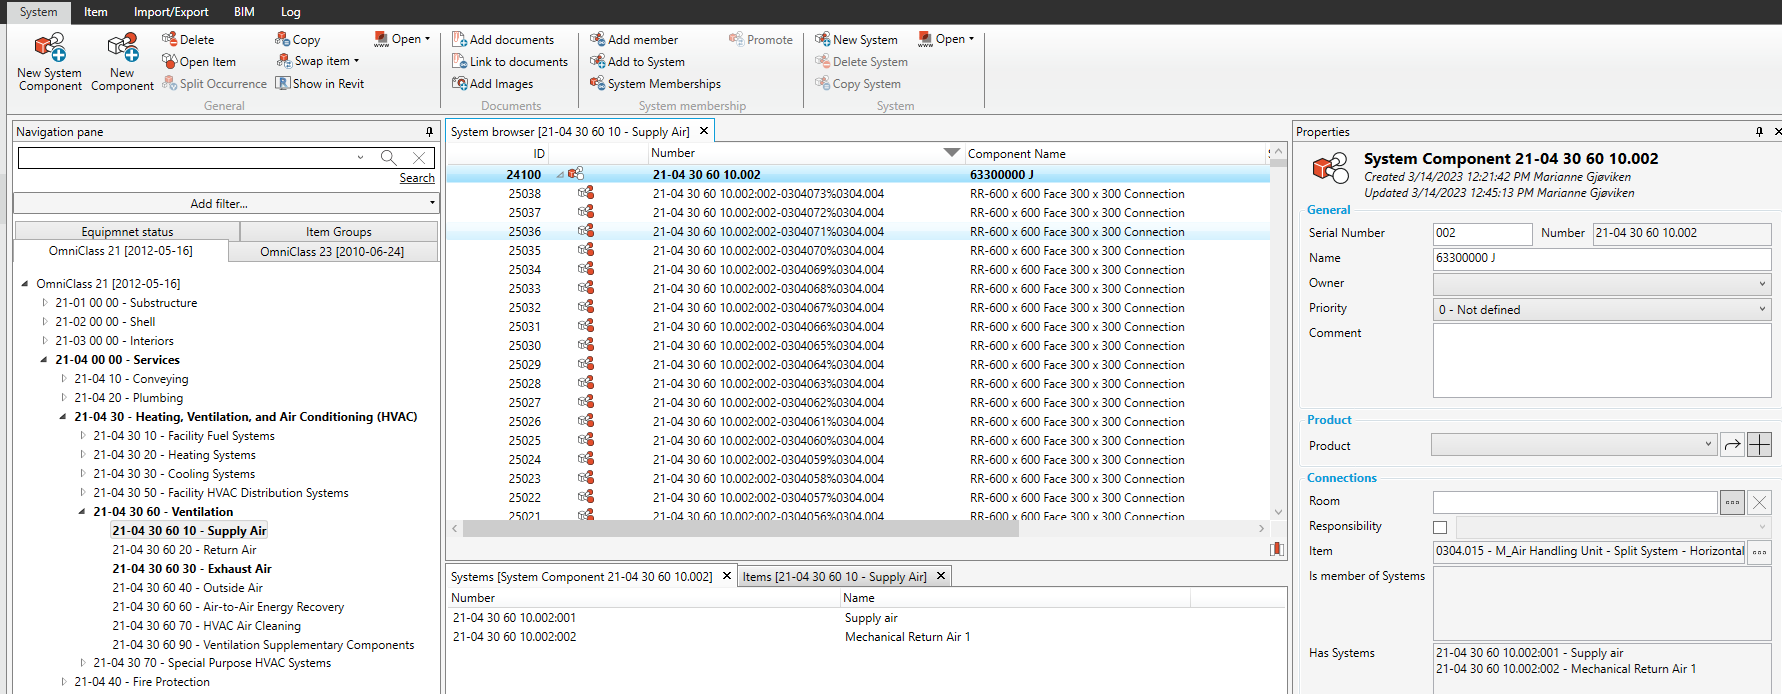
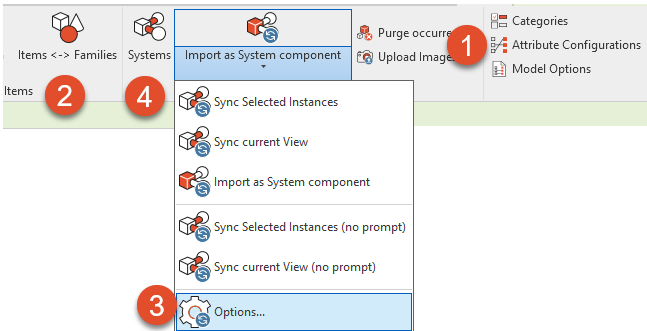
Import System Component and connected system from Revit
-
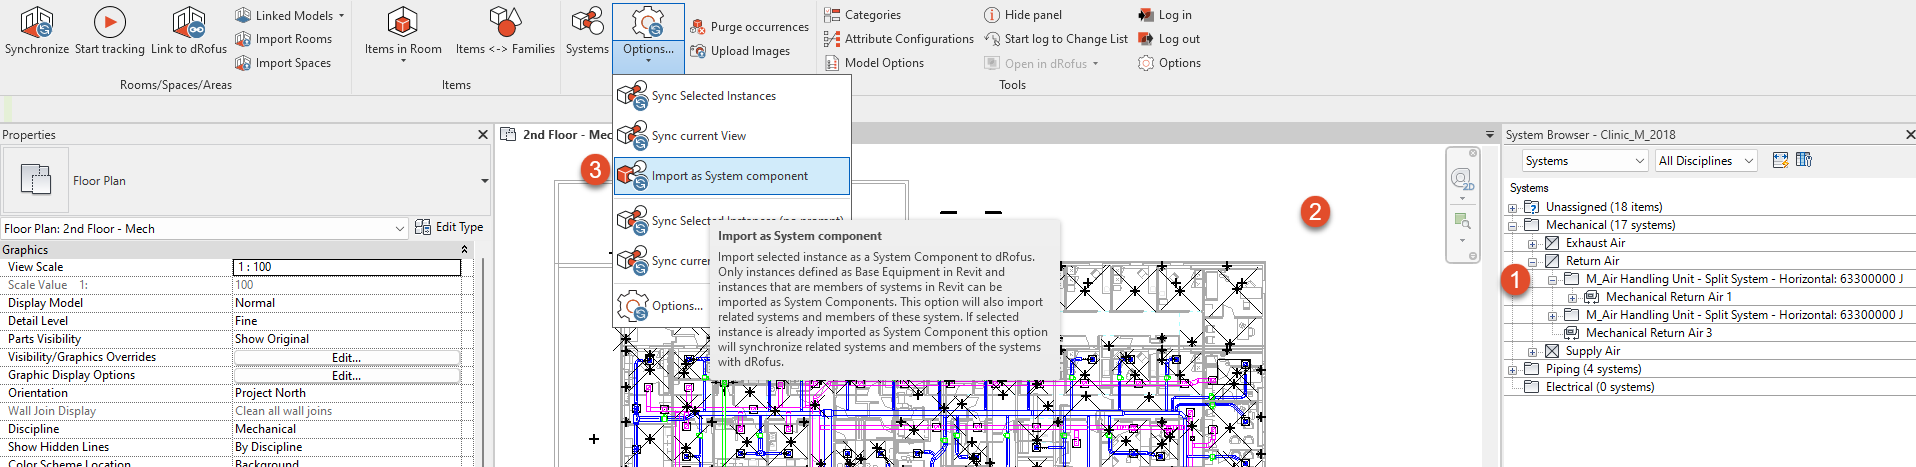
Select Family type instance that is owner of one or more systems
-
Click on the view to activate the view
-
Select “Import as System Component” . A list over Systems that the Item are connected to will appear.
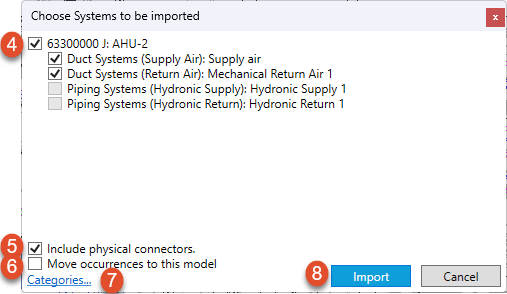
4. Select the System that you would like to import along with the System Component. Only the systems that the Item owns as a System Component can be selected. You are not able to select the Systems that the selected System Component only is a member of as a Component.
5. Select “Include physical connectors” if you will include all physical connectors as elbows, fittings, cables ect
6. Select “Move Occurrence to this model” if the occurrence has been connected to another model and you would like to change the model name. Read more: Split model and Update Model Name on Occurrences
7. Select Revit family categories that should be included in the import.
8. Select “Import “
A sync preview will appear:
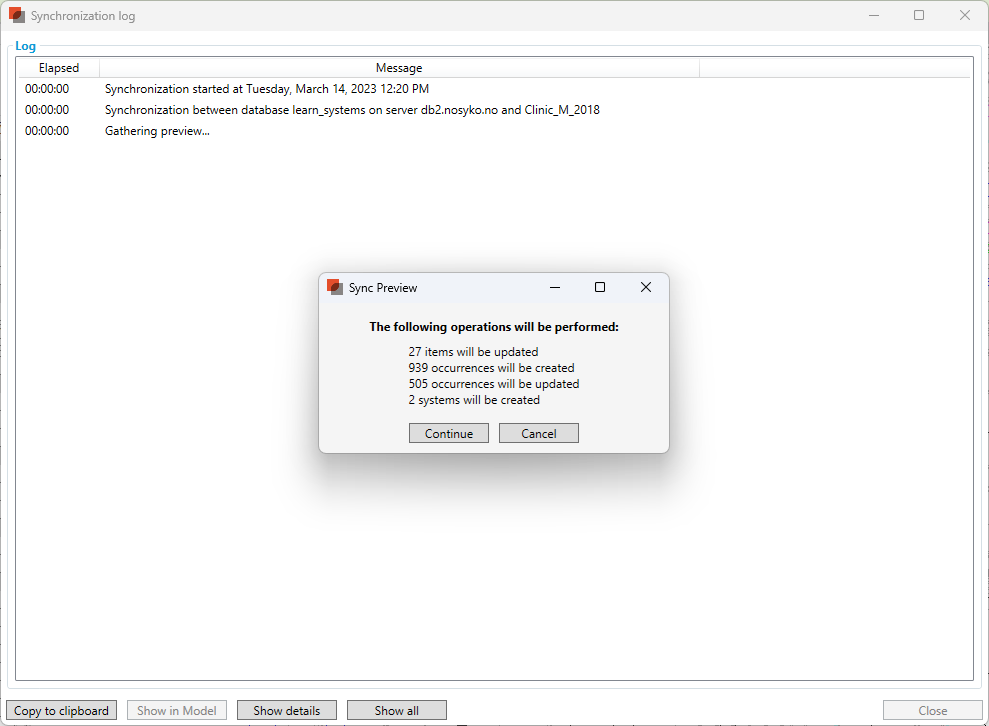
9. Select “Continue”
The System Component, System and Component can now be viewed within the System module in dRofus