.png)
Recommend reading about system in Introduction dRofus Systemsand Systems Module - Definitionbefore moving forward.
Before you can create a System Component, an admin user need to setup the databases classification. Add Classification to the database
Create system component in dRofus
System Component can be created either by:
a)Use existing Occurrence as component, by adding number giving System classification to the Item: Read more Set Classification on Component and System Component
b) Add “New component”:
-
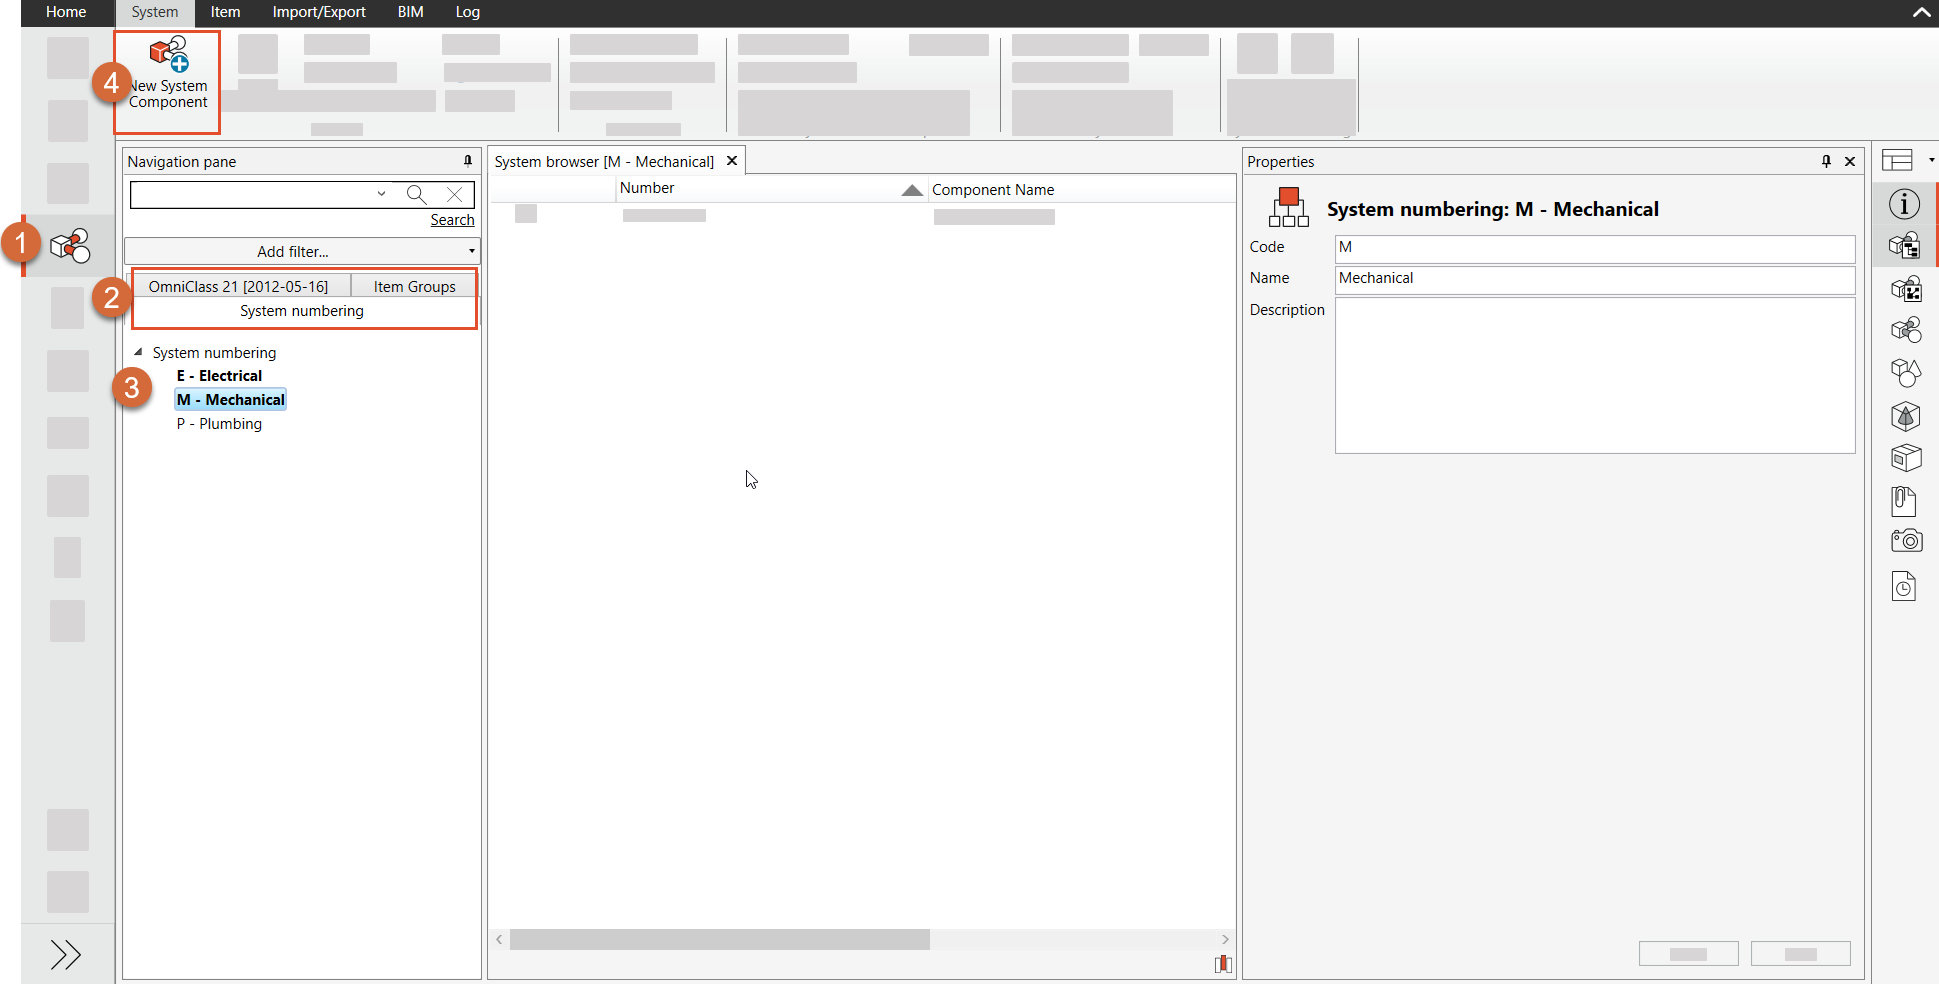
Open the System module
-
Select the Item Groups tab or a Classification tab in the Navigation Pane.
-
Navigate to the lowest level
-
Select “New System Component” and the window below will appear:

5. You have the option to manually set a Serial Number for the System Component, or it will be automatically assigned.
6. If you want to give the System Component a specific name, enter it in the text field. Otherwise, the System Component will be given the name of the selected classification or Item Group.
7. Options for adding Responsibility and Status vary from project to project. For example, a project may offer the ability to assign a specific individual the responsibility for a task and to indicate the status of the task (e.g. in progress, completed, etc.).
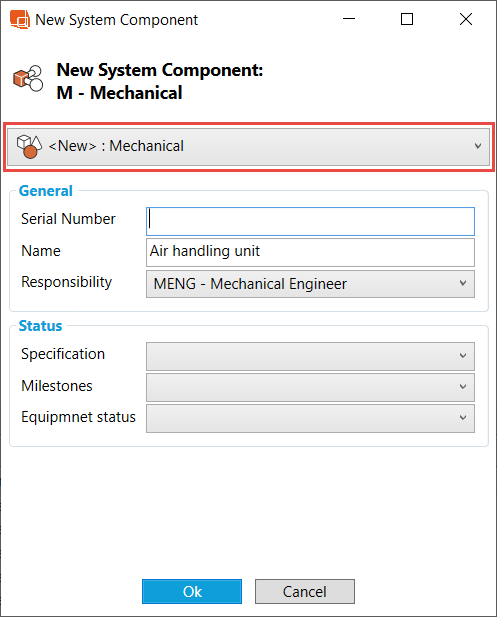
8. Select which Item to be used as a System Component either by:
a) Select an Item existing in the database
1.Select an Item in the first drop-down menu*
2.Select ok
*Available Items in the drop-down menu:
Selected Item Group in step 3: All items that belong to the same item group as the item you have selected will be shown in the list.
Selected Classification in step 3: All items classified under the selected classification can be found in a drop-down list.. Read more Set Classification on Component and System Component
or
b) Create a new Item
1.Select the <new> Option in the first dropdown menu.
2.Select which Item Group the new Item should be added to.
3.Select “Ok”
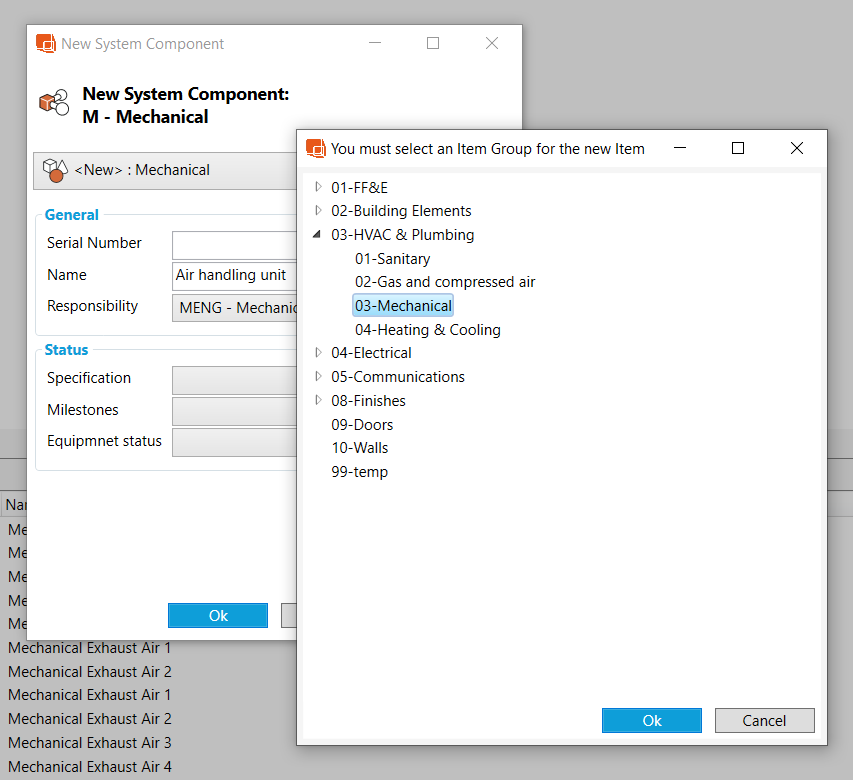
When creating a new item from the system browser, the item will automatically be set to "to be modeled", in order for it to be included in the modeling process.